Showing posts with label cheese. Show all posts

Friday, July 11, 2014

Favorites Friday - Cowboy Food

I have to share the story behind this one.  This is a recipe that my mom came up with when I was a little kid, but she originally called it "Bobbi's Ziti Beef Casserole".  My brother though it was icky and wouldn't eat it until my dad told him "this is what cowboys eat!", and then, of course, he loved it!  Ever since then, it has been known as "Cowboy Food", and it has been a family favorite.  I began making it for friends that came over in college, and they all loved it, too.  It's a good way to fix something fairly quick when people come over, but if you make it for just two people it makes good leftovers, too.  My husband and I make it fairly often, and by now we have added our own little modifications to improve on the original recipe.

Look at that glisten of cheesy goodness!


Cowboy Food
Makes 8 4 servings (Who am I kidding? We scarf this stuff down!)

Ingredients
  •  ~1 lb ground beef
  • 1 T onion flakes
  • 1 can cheddar cheese soup
  • 1 3/4 C ziti
  • 1 C frozen peas (or a little more if you want to sneak in extra veggies)
  • 1 1/2 C water
  • 1/2 tsp salt
  • 1/8 tsp black pepper
  • 1/8 tsp cayenne
  • 1 tsp paprika
  • 1-2 handfulls of shredded cheddar (this is one of those modifications we made to the original)
Instructions
  1. Brown ground beef in large skillet and drain grease.
  2. Add seasonings, water, cheddar cheese soup, ziti, and peas.
  3. Bring to a boil.
  4. Cover and simmer for 15 minutes, or until ziti is cooked.
  5. Remove lid, add cheddar cheese, and stir.  (You could add in the cheese near the end of the simmer time, if you prefer to have more melting time.)
  6. Let sit a few minutes for cheese to melt and sauce to thicken.

The amounts above are for the original fairly mild version.  If you like it spicier (like me), you can add extra pepper and even a little chili powder to taste.  I usually make the whole thing with approximately the amounts called for, and just add extra spice to my bowl.  Another tip: use frozen peas, not canned. I used canned peas one time, and it just didn't taste right.

Enjoy!

Friday, June 13, 2014

Favorites Friday - Tuna Noodle Casserole

I had this recipe ready to post over a month ago, but apparently I never clicked the "publish" button.  Oops.

This is one of our favorite recipes, and comes from the hubby's side of the family.  (Originally from his grandmother, I think.)  It is great for feeding a crowd on a budget, and the crowd loves it!  It also makes good leftovers, reheated with a splash of milk so it's not too dry.  We tend to make an entire casserole for just the two of us, because we know we'll eat it all up within a few days.

This recipe is also easily adjustable for your personal taste, and I have noted some of our optional variations below.  Last time I made it I tried it with some pepper jack cheese, and I thought it added some good flavor.  Note that neither of us like mushrooms, but we don't mind cream of mushroom soup.  If you REALLY don't like mushrooms, you could substitute something like cream of celery instead.  (Or if you're one of those strange people who really loves mushrooms, you could add some.)  


Tuna Noodle Casserole
Makes: 13x9 casserole, ~8 servings

Ingredients
  • 1 lb bag extra wide egg noodles
  • 1 can cream of chicken
  • 1 can cream of mushroom
  • 2 cans tuna, well drained
  • 1 lb shredded cheddar, 1 or 2 handfuls reserved
  • 1/2 can peas (drained)
  • 1 can milk

Optional:
  • remaining 1/2 can peas
  • 1/2 can to 1 can petite diced tomatoes
  • swap half the cheddar for pepper jack cheese
  • crushed potato chips (cheesy chips are best) or bread crumbs sprinkled on top
  • canned chicken instead of tuna


Instructions
Boil the noodles, but do not overcook (they will bake more in the oven).  While noodles are boiling, mix remaining ingredients in a 13x9 casserole dish.  Add cooked noodles and mix again.  (If noodles cannot be mixed, add a little more milk.)  Bake at 425 degrees for about 20-25 minutes.  Sprinkle reserved cheddar cheese evenly over the top and bake for another 5-10 minutes, until cheese is fully melted.

This is about what it should look like before adding the noodles
(I forgot to take a picture once it came out of the oven.  I think I was distracted watching Sherlock at the time.)

Tuesday, April 29, 2014

Smoky Bacon Pork Chops

This is another recipe I tasted at Publix, and couldn't wait to make it at home.  I also discovered how yummy pork can be, and it was cheaper than I thought.  I sense more pork recipes in my future!


Smoky Bacon Pork Chops
Makes 4 servings

Ingredients
  •  4 thick pork chops (original recipe calls for bone-in, but I used boneless)
  • 3oz pepper jack cheese, shredded
  • 3 green onions, finely chopped
  • 1/4 C cooked bacon pieces 
  • 1/4 C light mayo
  • 1 tsp chipotle pepper sauce
  • 2 tsp mesquite seasoning
Instructions
  1. Preheat oven to 425F.  Line baking sheet with foil.
  2. Season pork chops with mesquite seasoning; place on baking sheet.
  3. Combine cheese, onions, bacon, mayo, and pepper sauce.
  4. Spread cheese mixture evenly over pork chops.
  5. Place on middle rack; bake 8-9 minutes.
  6. Turn oven temp to broil; broil 2-3 more minutes or until pork is browned and up to 145F.

Publix's Aprons recipe usually includes nutrition information, and this one weighs in at only 370 calories per serving.  Using the nutrition calculator on My Fitness Pal for the specific ingredients I used, the calories per serving came out to about 320. 

Om nom nom

The cooking time needs some adjustment.  I left it in a little longer than the recipe said, and it was still a little too pink in the middle when I cut into it, so I had to put it back in the oven for a few minutes.  I think it ended up getting a little overcooked in the end, though.  Maybe try 11-12 minutes, then broil for 2-3?  The pork chops definitely had a little kick to it, maybe a bit too much mesquite seasoning, though, so go easy on the seasoning.  I used real bacon bits because I keep them on hand and it was just fine.  I'm sure real bacon cooked fresh for the recipe would be even better, but it was so much easier to just use the ready to go bacon bits.  Overall, this was a pretty easy recipe to make.
The Verdict
Tony thought it "wasn't bad", and I thought it was quite yummy!  I will probably make it again sometime.  And I will definitely give more pork recipes a try!

Friday, April 11, 2014

Favorites Friday - Cheesy BBQ Sloppy Joes

This has been a favorite of ours since I first tried it several years ago.  I came across this recipe in a Southern Living magazine, so I can't take credit for this awesomeness.  I was able to dig up the original recipe online here.

Cheesy BBQ Sloppy Joes
Makes: about 4 servings

Ingredients
  • 1 1/2 lbs ground beef
  • 1 (14.5oz) can petite diced tomatoes
  • 1 C ketchup
  • 1/2 C BBQ sauce (we often use Sweet Baby Ray's or whatever's open)
  • 1 T Worcestershire sauce
  • 2 T chopped jalapenos, from jar
  • 1 T juice from jar of jalapenos
  • garlic texas toast (1-2 slices per serving, depending on the size of the toast)
  • shredded cheddar cheese, for topping
Instructions
Brown ground beef in large skillet; drain grease. Stir in tomatoes, ketchup, BBQ sauce, Worchestershire sauce, jalapenos, and jalapeno juice.  Cover and simmer about 10 minutes, until sauce has thickened.  While sauce is cooking, prepare texas toast.  Serve sauce mixture over texas toast and sprinkle cheese on top.


This is a good "grown up" version of Sloppy Joes that packs a lot of flavor.  The jalapenos add some spiciness, but you can adjust to your personal preference. (I love it spicy!) Combining with the garlic toast and cheese is what really seals the deal, though.  Be warned, this recipe is so "sloppy" that it just needs to be eaten with a fork! 

(Note: I tried to double the recipe once, but it was difficult to get the sauce to thicken up right with more in the pan.)

Wednesday, April 9, 2014

Baked Brie Bites

This is a pretty simple recipe that I adapted from here.


Baked Brie Bites
Makes 18

Ingredients
  • 1 pkg puff pastry sheets
  • 8oz brie
  • 1C preserves/jam (appx)

Instructions
Thaw puff pastry according to directions.  Preheat oven to 350F.  Cut each puff pastry sheet into 9 squares.  (Pillsbury is folded into thirds, so that makes it pretty easy.)  Grease muffin/cupcake pans.  Place pastry squares over muffin cups, and poke in slightly.  Cut brie into evenly sized chunks (include the crust) and place one piece in the center of each pastry.  Top with about 1tsp of preserves.  Bake for about 15 minutes, until pastry is golden on edges (do not overbake).

I have made this recipe twice now, using a homemade caramel apple jam (tastes more like apple pie filling).  Both times, it was a hit!  They disappeared quickly, and everyone could barely wait until it was cool enough to eat.  Even people who said they weren't fans of brie thought it was good.  A few tips I have found after making this twice now: use the puff pastry when it is still cool, make sure to grease the muffin tins, bites are easier to remove from pan after cooling slightly but still warm.

(Note: looking back at the original recipe now, I see that it was for 24 bites; the puff pastry sheets were cut into 12 pieces each.  Either way would work just fine.)

The Verdict
Definitely a new favorite!  This one gets added to my "recipe book" and I am looking forward to trying it again and again with different flavored preserves.  Maybe cranberry next time?

Friday, February 7, 2014

Pasta Carbonara

This recipe originally comes from this blog, and is adapted from The Pioneer Woman's recipe.  If you've ever tried anything from The Pioneer Woman, you know it's going to be good!

What first drew my attention to this recipe (besides the picture looking delicious) was that the description said there was no cream, and the bacon grease is drained, so it is a "lighter" pasta dish.  Also....BACON!  With my calculations, it comes out to about 440 calories per serving (makes 4 servings).  Not bad for a pasta dish with cheese and bacon!  For one serving to be enough, and actually feed four people, be prepared to have a side with it (salad or lightly steamed green veggies would be perfect).

Here's how mine turned out!


Without any further ado, lets get on to the recipe!

Pasta Carbonara
Cooking time: about 1 hour
Serves: 4

Ingredients:
  • 1/2 pound bacon or pancetta (I used bacon)
  • 1 whole small onion
  • 5 cloves garlic
  • 1/2 cup white wine (or chicken or vegetable stock...I used wine)
  • 1/2 cup chicken stock (or more)
  • 1/2 bunch parsley
  • 2 whole eggs
  • 1/2 cup Parmesan cheese plus more for garnish
  • 1/2 pound linguine pasta
  • 2 tablespoons butter
  • salt and pepper to season


  1. Cook the bacon.  Place cooked bacon on a plate with a paper towel to absorb some of the grease.  Pour out most of the grease, but leave a little in the pan for the next step.  Try not to eat all the bacon before it goes in the dish (this is the hard part!).
    Mmmm...bacon!  Cooking with my new Le Cruset pan.  Love it!  It's me new favorite pan!
  2. Chop onion into small pieces (you can do this while the bacon is cooking).  Cook diced onion in a reasonable amount of bacon grease for a few minutes on medium-high heat while stirring.  Avoid burning it, and don't overcook (it will get cooked a little more later).
    My new knife!
  3. It's not in the original instructions in this order, but I recommend starting your pot of water boiling while the onions are cooking.  (I forgot to make the pasta until it was about time to put it all together.  Yes...I forgot the pasta in a pasta dish. *facepalm*)
  4. Slice the garlic and add it to the onions.  Cook together for a few more minutes, then scoop the onions and garlic from the pan with a slotted spoon and discard the grease.
  5. Put the pan on high heat, and add the wine (or chicken stock) to deglaze the pan.  Stir, making sure you get all the bits of bacon goodness scraped off the pan.  Add the chicken stock, bacon (crumble/tear it up into pieces), and onion/garlic mix.  Let simmer on low heat.  Do not let too much liquid evaporate; add a little more chicken stock if needed while it simmers.
    Step 5 1/2: taste the wine!
  6. Cook the pasta according to box instructions.
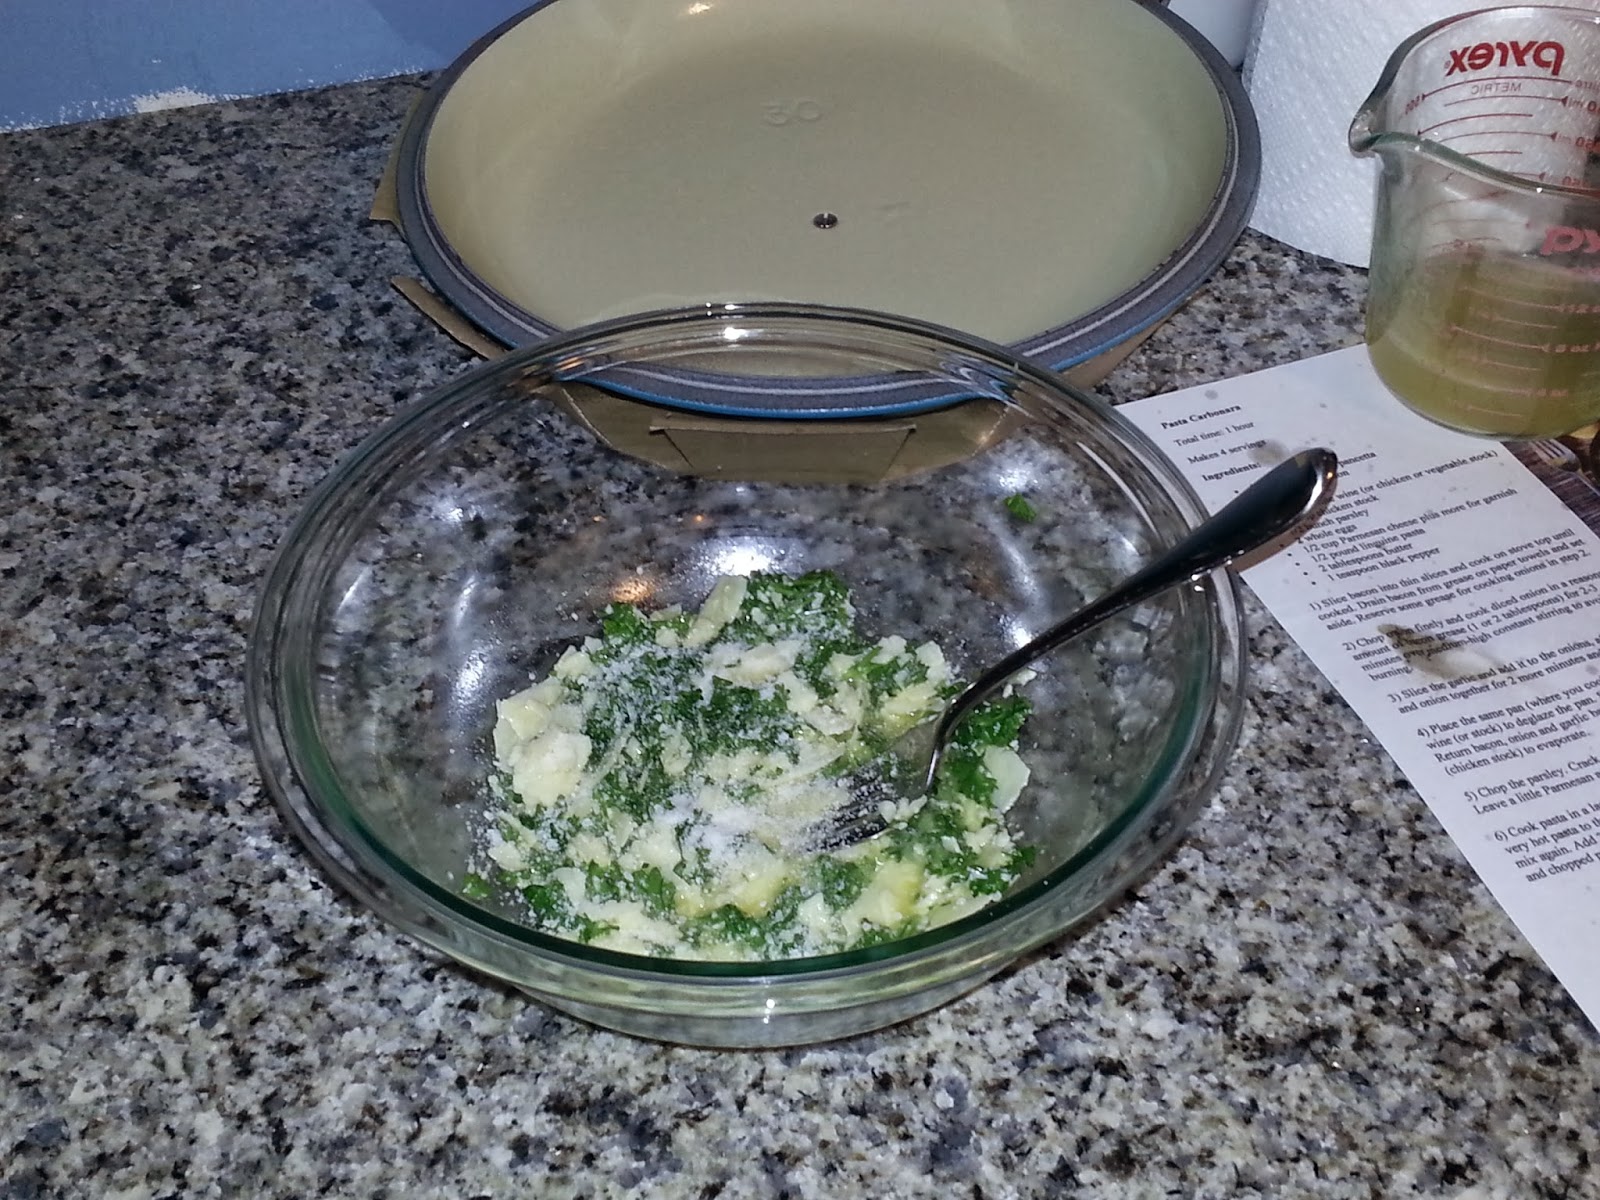
  7. While the pasta is cooking, in a large bowl add together eggs and parmesan.  Chop the parsley and add to the bowl.  Mix well with a fork. 
  8. Drain the pasta, and add to the egg mixture.  My suggestion is to add the hot pasta to the egg mixture a little bit at a time, so you don't end up with bits of scrambled egg.  Mix well.  Add onion, garlic, and bacon mixture and mix again.  Add butter, salt and pepper to taste.  Garnish with additional cheese and parsley.
All mixed up

The Verdict
Drumroll please............I loved it!
The egg and cheese based sauce reminded my of a family dish, but the onion, garlic, and bacon pack way more flavor into the dish.  I was a little skeptical of the parsley and it seemed like a lot to me, but the flavor really complimented the dish nicely.  Don't be afraid of the parsley!  The pepper added at the end was also important for bringing out the flavors in this dish.  I liked it so much, I went back for seconds and finished off the leftovers the next day.  (Side note: with this kind of sauce, it's best eaten fresh and not reheated.)  Even lightened up, it was still a bit greasy, but not too bad. 
The hubby, on the other hand, was not a fan.  He only had a few bites and said it "wasn't his thing".  For some reason, he is against eating pasta as a main dish without "some sort of protein" (like chicken, meatballs, etc.).  My response?  "Bacon is protein!  So is egg!"  But that brings me to another point: this would probably be really good with some chicken strips, maybe lightly grilled or sauteed with some blackened seasoning.  I might add some more cheese next time, too.  (Who doesn't like more cheese?)  

I'm definitely saving this recipe to make again!