Saturday, February 15, 2014

Skillet Chili Mac

This is a recipe that I thought had a lot of potential.  I like Hamburger Helper's chili macaroni, and here was a homemade, from scratch version that looked like it had a lot of flavor from ingredients like sausage and peppers.  It is a one skillet dish, and is pretty easy to make.


The original recipe was taken from Deep South Dish.

Skillet Chili Mac
Serves 6-8*

Ingredients

  • 1/2 tablespoon of cooking oil
  • 1-1/2 cups of chopped onion (about one medium sized onion)
  • 1/2 cup of chopped bell pepper (I used some orange bell pepper I had already chopped in the freezer)
  • 1 or 2 jalapenos, chopped (I used jalapenos from a jar, because I keep it stocked at our house)
  • 1 pound of ground beef
  • 1 pound of raw breakfast sausage
  • 1 tablespoon of minced garlic
  • 2-1/2 tablespoons of chili powder, or to taste
  • 1/2 teaspoon of cumin
  • 1/4 teaspoon of dried oregano
  • Kosher salt and black pepper, to taste
  • 1 (14.5 ounce) can diced tomatoes
  • 1 (8 ounce) can of tomato sauce
  • 1 (7 ounce) can green chilies
  • 2 cups of water
  • 1 (15.5 ounce) can pinto or red kidney beans, drained and rinsed
  • 1-1/2 cups of dry medium cut pasta (like elbow macaroni or shells)
  • 1 cup of shredded Cheddar cheese, divided, or to taste, plus more for garnish (I used at least twice this much cheese)
  • Optional Garnishes: Sliced green onions, fresh diced tomatoes, sour cream or your other favorite chili toppings
Instructions

Heat the oil in a large lidded skillet over medium high heat; add the onion and peppers, and cook for about 4 minutes, or until vegetables are tender. To that, add the ground beef, sausage and garlic, breaking up the meat and cooking, until no longer pink. Drain off any excess fat. Stir in the chili powder, cumin, oregano and salt and pepper; taste and adjust seasonings.

Add the diced tomatoes, tomato sauce and green chilies; stir. Add the water, beans, pasta and half of the cheese. Bring to a boil, stir, cover and reduce heat to simmer. Simmer for 20 minutes or until pasta is cooked through; uncover, stir and let simmer, uncovered, until reduced to desired consistency. Sprinkle remaining cheese on top, cover and cook over low until cheese melts. Garnish and serve.


The Verdict
It was okay, but nothing special.  The recipe as-is was not spicy enough or cheesy enough for my liking.  I have been adding more spices (cayenne and chili powder) and cheese whenever I eat leftovers.  The sausage also added a flavor that I didn't think went very well with the other flavors.  I wouldn't make this again the same way, but I would potentially take some elements from this (like the kidney beans and jalapenos) and add it to Cowboy Food (a Hamburger Helper-like family recipe, which I will probably post someday).  

I garnished mine with more cheese and some fresh green onion

*The author noted that her recipes typically make 6-8 servings.  In my opinion, this made WAY more than that!  We have eaten at least that many hearty portions, and still have several portions left.  In fact, I'm getting tired of eating it but it seems like it will never end!

Friday, February 7, 2014

Pasta Carbonara

This recipe originally comes from this blog, and is adapted from The Pioneer Woman's recipe.  If you've ever tried anything from The Pioneer Woman, you know it's going to be good!

What first drew my attention to this recipe (besides the picture looking delicious) was that the description said there was no cream, and the bacon grease is drained, so it is a "lighter" pasta dish.  Also....BACON!  With my calculations, it comes out to about 440 calories per serving (makes 4 servings).  Not bad for a pasta dish with cheese and bacon!  For one serving to be enough, and actually feed four people, be prepared to have a side with it (salad or lightly steamed green veggies would be perfect).

Here's how mine turned out!


Without any further ado, lets get on to the recipe!

Pasta Carbonara
Cooking time: about 1 hour
Serves: 4

Ingredients:
  • 1/2 pound bacon or pancetta (I used bacon)
  • 1 whole small onion
  • 5 cloves garlic
  • 1/2 cup white wine (or chicken or vegetable stock...I used wine)
  • 1/2 cup chicken stock (or more)
  • 1/2 bunch parsley
  • 2 whole eggs
  • 1/2 cup Parmesan cheese plus more for garnish
  • 1/2 pound linguine pasta
  • 2 tablespoons butter
  • salt and pepper to season


  1. Cook the bacon.  Place cooked bacon on a plate with a paper towel to absorb some of the grease.  Pour out most of the grease, but leave a little in the pan for the next step.  Try not to eat all the bacon before it goes in the dish (this is the hard part!).
    Mmmm...bacon!  Cooking with my new Le Cruset pan.  Love it!  It's me new favorite pan!
  2. Chop onion into small pieces (you can do this while the bacon is cooking).  Cook diced onion in a reasonable amount of bacon grease for a few minutes on medium-high heat while stirring.  Avoid burning it, and don't overcook (it will get cooked a little more later).
    My new knife!
  3. It's not in the original instructions in this order, but I recommend starting your pot of water boiling while the onions are cooking.  (I forgot to make the pasta until it was about time to put it all together.  Yes...I forgot the pasta in a pasta dish. *facepalm*)
  4. Slice the garlic and add it to the onions.  Cook together for a few more minutes, then scoop the onions and garlic from the pan with a slotted spoon and discard the grease.
  5. Put the pan on high heat, and add the wine (or chicken stock) to deglaze the pan.  Stir, making sure you get all the bits of bacon goodness scraped off the pan.  Add the chicken stock, bacon (crumble/tear it up into pieces), and onion/garlic mix.  Let simmer on low heat.  Do not let too much liquid evaporate; add a little more chicken stock if needed while it simmers.
    Step 5 1/2: taste the wine!
  6. Cook the pasta according to box instructions.
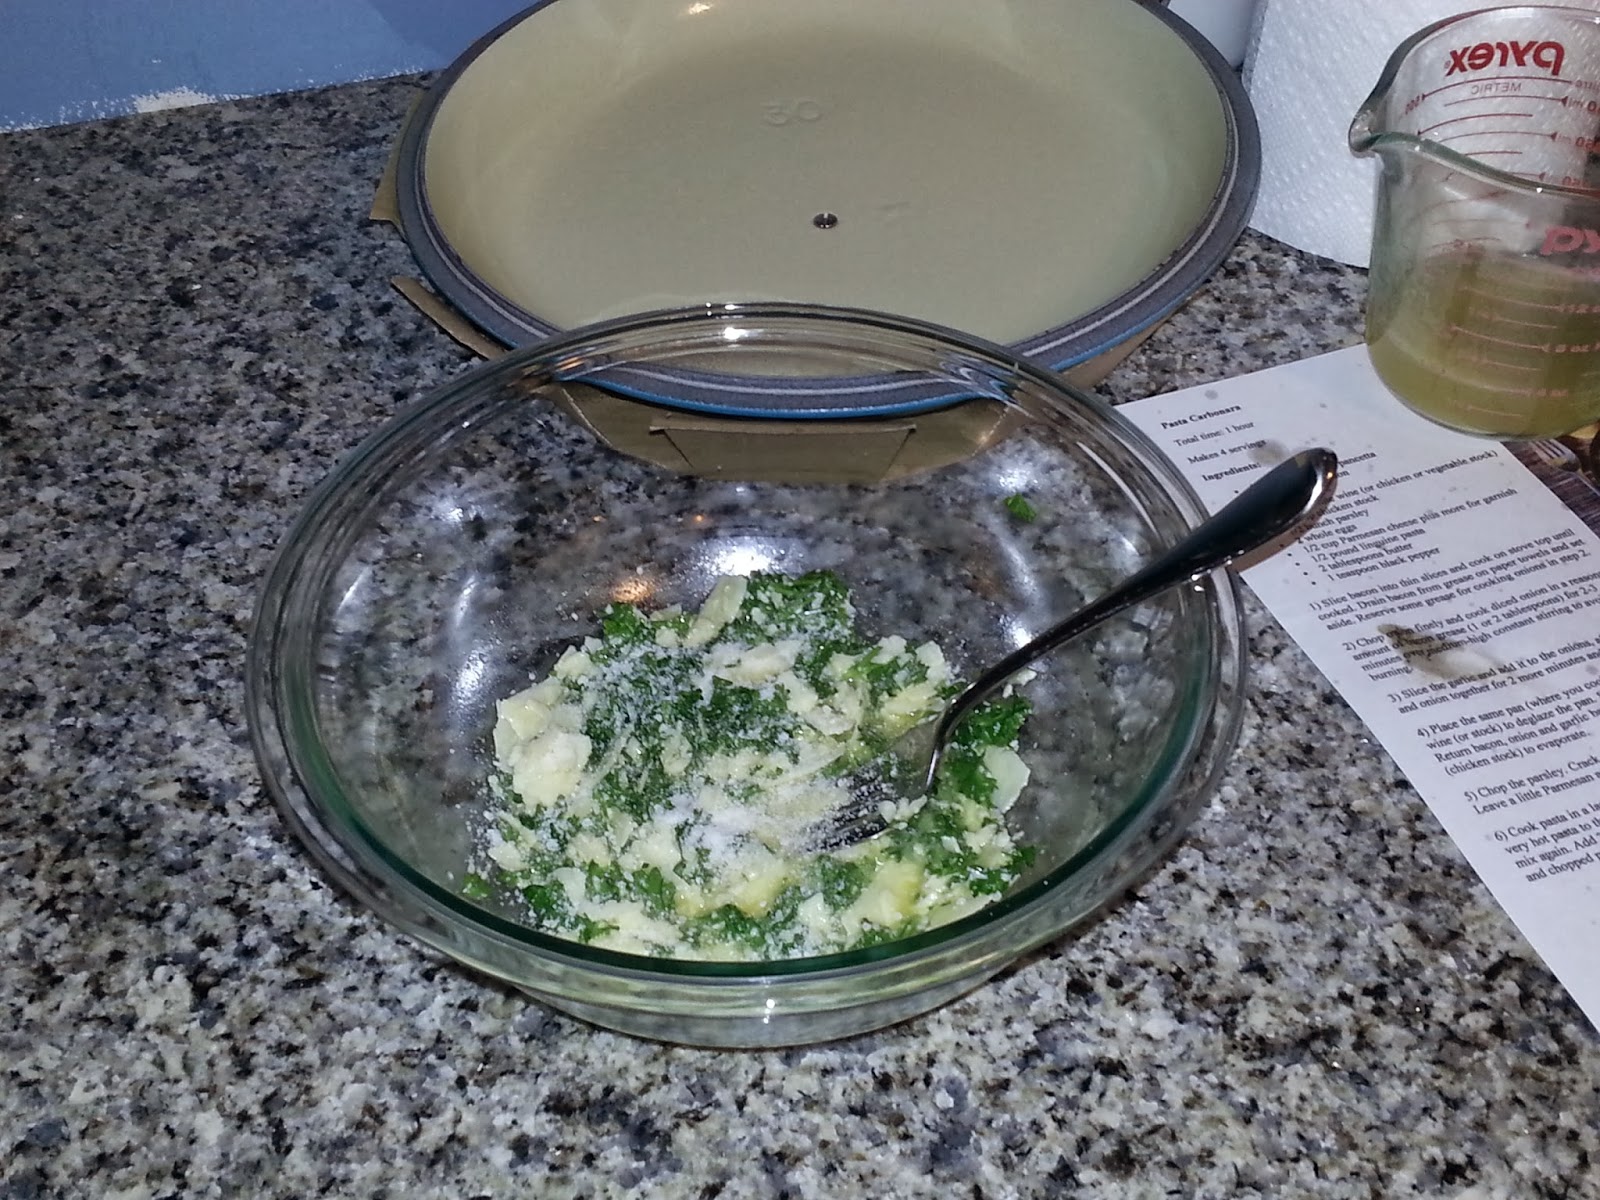
  7. While the pasta is cooking, in a large bowl add together eggs and parmesan.  Chop the parsley and add to the bowl.  Mix well with a fork. 
  8. Drain the pasta, and add to the egg mixture.  My suggestion is to add the hot pasta to the egg mixture a little bit at a time, so you don't end up with bits of scrambled egg.  Mix well.  Add onion, garlic, and bacon mixture and mix again.  Add butter, salt and pepper to taste.  Garnish with additional cheese and parsley.
All mixed up

The Verdict
Drumroll please............I loved it!
The egg and cheese based sauce reminded my of a family dish, but the onion, garlic, and bacon pack way more flavor into the dish.  I was a little skeptical of the parsley and it seemed like a lot to me, but the flavor really complimented the dish nicely.  Don't be afraid of the parsley!  The pepper added at the end was also important for bringing out the flavors in this dish.  I liked it so much, I went back for seconds and finished off the leftovers the next day.  (Side note: with this kind of sauce, it's best eaten fresh and not reheated.)  Even lightened up, it was still a bit greasy, but not too bad. 
The hubby, on the other hand, was not a fan.  He only had a few bites and said it "wasn't his thing".  For some reason, he is against eating pasta as a main dish without "some sort of protein" (like chicken, meatballs, etc.).  My response?  "Bacon is protein!  So is egg!"  But that brings me to another point: this would probably be really good with some chicken strips, maybe lightly grilled or sauteed with some blackened seasoning.  I might add some more cheese next time, too.  (Who doesn't like more cheese?)  

I'm definitely saving this recipe to make again!

Friday, January 31, 2014

Ice Cream Cake

Is it possible for food to be a pun?  I saw this idea on Pinterest, and I thought it was the cutest thing!  It's an ice cream cake that looks like ice cream!

My niece was having a birthday party (6 years old!), and I thought I would make her cake since I was actually in town (and I made her sister cupcakes for her birthday, so it was only fair).  I had another cake in mind, but the girls said they wanted ice cream cake, so I had the perfect excuse to finally try this out!

I didn't really follow a particular recipe.  I gathered tips from various magazines and Pinterest and used them as a guide for making this cake.
 

Step 1:
Bake the cake.  I used a white cake mix and added sprinkles to turn it into sort of a "funfetti" cake.  You will need to bake it in 2 pans for the layers.  The cake layers didn't turn out as thick as I would have liked, so I had to improvise.  If you were to use more cake batter to get thicker layers, you could slice each cake layer in half, giving you more layers to work with when it comes time to layer with the ice cream.


Let the cakes cool thoroughly before moving on to the next step!  (I baked the cake in the morning, and layered in the evening.)
(Step 1.5: Lick the bowl!)

Step 2:
Make the ice cream layer!  I used a full container of strawberry ice cream (I think they're about 1.5 quarts now).  Here's where one of the tips I found came in handy: line a cake pan (the same size you used to bake the cake) with plastic wrap.  Scoop out the ice cream into the pan, and press flat with a large spoon.  It may help to run some hot water on the spoon to heat it up first.  Once it is nice and flattened, stick it in the freezer for about 20 minutes.


While the ice cream is in the freezer, level the tops of your cake layers.

Step 3:
Layer it up!  Place your bottom layer, flip out your ice cream layer onto it, and top with the last cake layer.  (If the cake came out thick enough to cut into more layers, I would have used 3 layers of ice cream with less in each layer, and 4 layers of cake.  But this worked well enough.)
Put it back in the freezer for 12-24 hours.  (I left it overnight.)

Step 4:
(This is where you have to start working quickly, so the cake doesn't melt!)
Frost the cake.  I made a homemade buttercream frosting, dyed pink.  I need to work on my buttercream skills, because while the texture was pretty good, it seemed too sweet to me.  I started out by piping frosting into the gaps between the layers, then zig-zagging across teh sides and top, before spreading ti smooth with a spatula.  This method gets good, even coverage of your frosting with ZERO cake crumbs getting into it while you spread!


Put the cake back in the freezer while you prepare to decorate.

Step 4:
Decorate.  
a) I started by cutting some waffle cones in half.  This was really tricky to do without ending up with shattered pieces of waffle cone.  After a few tries, I discovered that there are sort of faint "corners" in the cone (ie not perfectly round) from the way it was molded.  If I lightly cut at those lines, they cut in half fairly well.  I also ended up having to cut the tips off because the cones were too tall for the cake.  Glue the cones to the side of the cake with some leftover frosting, and put the cake back in the freezer.


b) Next, I whipped up some homemade whipped cream.  This is pretty easy: put some heavy whipping cream in the mixer and whisk on high.  Add a little sugar and (optionally) some cream of tarter or merengue powder (helps keep stiffness), and whisk until stiff.  Pipe the whipped cream in the middle of the "cones" using a large star tip and top with maraschino cherries.  Put the cake back in the freezer.

 (I ran out of whipped cream, so I used leftover frosting in one if the cones instead.)

(Side view, with sprinkles.)

c) Lastly, the finishing touches!  I added some sprinkles on top and drizzled with shell chocolate and caramel.  Other ideas: nuts, strawberry sauce, banana slices, or pretty much whatever you would put on an ice cream sundae!


Verdict: It was good, and looked fantastic!  I would definitely make it again, and there are plenty of different variations that could be done.  Even though I personally thought the buttercream was too sweet, others said the overall cake itself wasn't. Oh yeah, and bits of waffle cone when you're eating ice cream cake?  Heaven.

Wednesday, January 29, 2014

Slow-Cooker Chicken Marakesh

To start this post, I would like to give a little background as to why I made this recipe.

Several years back, I went to a Moroccan restaurant in Tampa.  I ordered a lamb tagine dish, and it was so amazing I still crave it to this day.  Unfortunately, the restaurant was closed down the next time I went back (after talking about how awesome it was and finally dragging the hubby out there with me).  That dish is still emblazoned on my mind (and taste buds), and I haven't stopped thinking about somehow finding a similar dish or re-creating the recipe.

Fast forward to this Christmas and New Year holiday season.  I was working 10-16 hour days and coming home completely exhausted; too tired to cook anything, and sometimes too tired to even decide what to eat.  During about a two week period, we ate a lot of fast food, take-out, pizza, and frozen dinners.  It gets old quick, and I really wanted some home-cooked food, even though I was too tired to make anything.  When my work schedule got back to normal, I found chicken breasts buy-one-get-one-free at Publix.  I thought this would be a good time to try my hand at some bulk food prep...fixing several crockpot meals at once, and putting them in the freezer for later use.  This was one of those recipes I selected, but I ended up making this one fresh (not freezing it first) over the weekend instead.  Stay tuned for reviews of my other freezer-to-crockpot meals!

Here is the pile of food, waiting to be prepped into several different recipes.

The original recipe, found here 


In the crockpot, ready to go!

The hubby didn't care for it (mostly because of the garbanzo beans), so I ended up eating all of it, which took what seemed like weeks! I thought it was pretty good, but I wouldn't make it again without making some changes. Some of the things I really liked about this recipe is that it was easy, healthy, good left over, and it was different.  (Oh yeah, and I believe it would be paleo if you just left out the beans!)  It was not like I expected, though, and nothing like the Moroccan tagine dish like I hoped it would be.  It was kind of sweet, and not really spicy like I expected.  If I were to make it again with the same spices, I would add raisins.  I think raisins would add a wonderful little burst of juicy sweetness, and they would be the perfect addition to this dish.  It also did not have much liquid, and some of the garbanzo beans seemed a little undercooked.  Next time, I might try adding just a little liquid to help the cooking process, and leave the beans and sweet potatoes on the bottom (and maybe even a little less sweet potato).

 
Why do I keep forgetting to take pictures until I'm already eating?

I ate it served over white rice, though I would try couscous if I make it again.  I also ended up adding some cumin and cayenne to the leftover I ate, to add a little more kick.  I definitely liked it a little spicier. 

Verdict: I might try this again in the future, either with raisins or hotter spices.  But I had to eat the leftovers for what seemed like for-e-ver, so not making it anytime soon!

Tuesday, January 14, 2014

Biscuits for Two

Ok, so the title is a bit misleading. I didn't make biscuits for two...I made biscuits for me. I decided to take the day off on Friday, so I slept in, and then thought about making a nice brunch. Biscuits sounded good...Really good. Ohhh, man... now I was craving some nice buttery homemade biscuits. But I didn't want to make a whole big batch that wouldn't all get eaten. Pinterest to the rescue! A quick search for "biscuits for two" (thinking this would also be handy in the future for me and the hubby) led me to this recipe: http://www.branappetit.com/2012/07/11/lazy-biscuits-for-two/  Looks good... and easy... and I have all the ingredients... score! 

It only took a few minutes to get them into the oven, and while they baked I whipped up some scrambled eggs with bacon and cheese.  I was so excited about my delicious brunch, that I forgot to take a picture for the blog until I had already started eating.  


They were delicious for something so easy!  I did forget that I was using a dark pan, so I didn't adjust the temperature and the bottoms came out a little burnt.  I also put a dab of margarine on top to melt over the biscuits as soon as they came out of the oven.

Here is the recipe, from Bran Appetit:


Round 2:

These were so good, I decided to make them again on Sunday morning!  This time, I remembered to use a lighter pan so the bottoms wouldn't burn.


By the way, whenever a recipe calls for buttermilk, I like to use buttermilk powder to mix my own.  I keep this can in the fridge, and use it as needed...no need to buy a whole jug of buttermilk that will just go to waste!

The first time I make the recipe, I didn't need all of the buttermilk.  So this time I added 1T buttermilk powder (makes 1/4C buttermilk) to the dry mix, and then added 1/4C milk later.  This time, for some reason, it needed the whole 3/4C of liquid.  However, I still had flour leftover in the bowl I used to coat the biscuits at the end, even after using it to make 2 batches.  So the amount of flour used for coating can be cut back.


Not burnt biscuits!  Unfortunately, this time they were a bit undercooked in the middle.  Perhaps a little longer in the oven would have helped, but they are kind of large biscuits, so maybe they need to be made smaller or flattened slightly to thoroughly cook in the middle.  I also dabbed a little margarine on top a few times near the end of the baking time.  Despite being slightly undercooked, they were still yummy! 

Perhaps it takes time and practice to be able to make the perfect biscuit, but as a novice biscuit-maker, these came out pretty darn good!  I will definitely be keeping this recipe for future use.  :-)

Tuesday, January 7, 2014

Better than Thin Mints - Grasshopper Poke Cake

First off, I would like to point out that this recipe (along with many others I will be writing about) is not my own.  Full credit goes to somethingswanky.  Trust me, if I came up with something this fantastic on my own, I would let you know!

I volunteered to make a cake for my dad's birthday dinner, and the only suggestion I got from others was "something with chocolate".  This recipe seemed fairly easy (I didn't want to commit to anything too elaborate after how exhausted I've been from work lately), and I had never done a "poke cake" before.  I was right, it was pretty easy to make, and I even had some added help from my sister who came over to hang out that evening.

The cake was a hit!  Everyone thought it was very yummy.  It was pretty rich, though, so I still have leftovers in my fridge.  (Darn.)  If I wanted to go back and make a lighter version of this cake, I would probably use half the toppings (cookies and Andes bits), leave out the condensed milk, an use more cool whip (light).  As it is, the recipe was delicious!  It had just the right balance of chocolate and mint, and a balance of fudginess (is that a word?) and crunchiness from the cookie bits.  I think it's the toppings that really give it that minty flavor.  Mmmmm!  Personally, I thought it could do with less toppings and more cool whip, but I think that's just me; everyone else said it was good the way it was.


Here's a step-by-step walk-through of the recipe.  The full, original recipe can be found here: http://www.somethingswanky.com/better-than-thin-mints-grasshopper-poke-cake/

Gather your ingredients.

(Not pictured: eggs, oil, water, cool whip) The ingredients took me 3 trips to grocery stores to gather everything. Not that anything was particularly hard to find. Publix was out of Andes bits and mint flavor packets, so I had to go to Bi-Lo, and then when I was getting started I realized I was almost out of eggs. Whoops. 

Bake the cake. 
In hindsight, I probably should have used the convection bake; it would probably help reduce the peak in the middle of the cake.  I used my deepest 13x9 pan, which also happened to have a lid.  This will come in handy later.

Allow cake to cool, then poke holes. I used a straw, but you could use the handle of a spoon or something if you don't keep straws around.

Pour condensed milk over the top the of cake, letting it flow into the holes. I had to use a spatula to keep spreading it to the middle because it all wanted to puddle up around the edges of the pan. 

Crush up half of the cookies. (Don't leave the pieces too big.)  Warm your fudge a little and mix it together. Spread on top of cake. At this point I recommend sticking the cake in the fridge for a few minutes to cool off the fudge layer. 

Whip together your cool whip and mint flavor packet. I added a few drops of food coloring for a brighter green look. Spread over the top of the cake. (This is why you want your cake to be cooled off again... so spreading it on top of the warm fudge doesn't melt your cool whip.)

Crush the remaining cookies and sprinkle on top. Sprinkle Andes bits on top. Chill for at least several hours.

Enjoy! (Warning: it will probably be a little messy!)

Note: I realize that my photos aren't very good.  There is room for improvement, but the photos can only be so good coming from a phone camera.  Maybe I will invest in a nice digital camera in the future, but it's not worth it right now because I wouldn't really use it that much.

Friday, January 3, 2014

First Post

I thought about possibly doing this blog last year, but somehow never got around to it.  Well, it's the start of a new year, and after mulling over it for a while it's still something that I want to do. 

So here's the deal:
Every week I will try something new. Mostly new recipes, but I might try a new variation on something I've done before or try a new technique.

I have sooooo many recipes I have been wanting to try!  The hard part will be narrowing down which recipes to try first!  So I am open to suggestions for what I should try next.  My recipe collections are on the following Pinterest boards (I had to start sorting them into categories because there are so many!):
Noms
Noms, Healthy Edition
Decadent Desserts
Cupcake Obsession
Crock Pot
Breakfast
Canning
Happy Hour

Once I have tried a recipe and reviewed it, I will pin it to this board:  Stuff I've ACTUALLY Tried

My Goal?
My goal is to not only expand on my Foodie horizons, and share my experiences (and "keeper" recipes) with others, but to also improve my writing skills and maybe my food photography skills in the process.