Thursday, November 20, 2014

Thirsty Thursday - Peach Pineapple Orange Smoothie

This is one of my favorite smoothies that I make at home.  I came up with this recipe, but it was inspired by one of my favorites at Tropical Smoothie Cafe.  The fruit is sweet enough by itself, so you don't need to add any sweetener.  The frozen fruit allows you to get a frozen smoothie without adding ice, which I believe waters down the smoothie and doesn't taste as good.  The yogurt adds creaminess, and the orange juice adds enough liquid to make it blend-able.  The result is a tasty combination of fruit flavors, which makes for a wonderful healthy breakfast or small meal replacement.

Sorry, no picture. But here - have a clip art!
(I'll take a picture next time I make it.)

Peach Pineapple Orange Smoothie
Makes 1 serving

Ingredients
  • ~1 C frozen pineapple chunks
  • ~1 C frozen peach slices
  • 1/2 to 1 container greek yogurt (I suggest vanilla or honey flavor)
  • orange juice (1/2 to 1 C or more)
  • optional: protein powder (I sometimes add a little BiPro protein powder, which is flavorless and unsweetened, so it can be mixed into just about anything without being noticed)
Instructions
Place all ingredients in blender, with a little bit of orange juice.  Pulse on ice setting until chunks are broken up, adding as much orange juice as is necessary to make it blend-able, a little at a time.  Puree until smooth.

Enjoy!

Wednesday, November 19, 2014

Hummus Crusted Chicken

This is a recipe that I had seen several variations of on Pinterest.  It seemed pretty easy, and healthy, and I like hummus...so why not?  So this is what I came up with after looking at a couple versions (all pretty similar).


Hummus Crusted Chicken
Makes 2 breasts (2-4 servings)

Ingredients
  • 2 chicken breasts (boneless, skinless)
  • 4 T hummus (roasted garlic flavor is good)
  • salt
  • pepper
  • paprika
Instructions
Pound the thicker parts of the chicken breasts thinner, so it will cook more evenly.
Place on a pan, preferably lined with foil.
Pat the tops of the chicken breasts dry with a paper towel.
Sprinkle lightly with salt and pepper.
Spread ~2T of hummus evenly on top of each chicken breast.
Sprinkle paprika on top.
Bake at 450°F for 35 minutes, or until chicken is thoroughly cooked.


I baked mine slightly different than what the recipe called for, because I had something else in the oven with it.  I baked mine at 350°F for about 35 minutes, and then turned it up to 450°F and baked it for about another 10 minutes.  It cooked through just fine, but that's probably why the hummus didn't get as crusty as I was expecting.


Round 2:  I made this recipe again, and cooked at the higher temperature.  The hummus still didn't really get "crusty", but I don't care...it was still good!

Round 3: I made it with cutlets instead of regular chicken breasts.  The thinner meat meant that it took less time to cook.  Cutlets may be a better choice if you want smaller portions, but it's really just a matter of preference.


The Verdict
Awesome!  I don't think the hubby likes it as much as I do, but I love it!  I would say "will make again", but I already have made it again!  I think it's one of my new favorites.

Monday, October 13, 2014

I'm the worst "flogger" ever

Seriously.  The worst. 
I am so bad at regularly posting recipes!

It's been pretty busy at work, and starting to get into the really busy time of year, so I can't promise it will get any better.  But I will try!  I have some recipes I've tried recently (and actually taken some pictures of), so I just need to write and share with all of you!

Right now, I'm trying to take care of the bushels of apples I have sitting in my kitchen.  We went apple picking last weekend and I have apples coming out my ears. Fresh produce waits for no man (or woman)! Once I get through all of those, expect a series of apple-related recipes to drool over!

TTFN
~Lisa


Friday, August 22, 2014

Favorites Friday - Easy Cobbler

This recipe has been around in my family ever since I was little.  I don't think we even had it written down anywhere, because it's so easy.  This recipe needs no introduction, really.  It's just good.  Maybe "cobbler" isn't the right word for it, but it's the closest thing I could think of to describe it.


Easy Cobbler
Makes one 8x8 dish, ~6-8 servings

Ingredients
  • 1-2 cans pie filling (cherry, blueberry, apple, peach)
  • 1 box Jiffy cake mix
  • 1 stick butter or margarine, melted
Instructions
Preheat oven to 400°F.  Dump pie filling into 8x8 (or similar) pan and spread out evenly.  
This pan was actually 8x10
Sprinkle dry cake mix evenly on top.  

Pour melted butter on top, as evenly as you can (don't worry, it's impossible to really get it distributed evenly).  
Ready to go in the oven
Bake for 25 minutes or longer, until topping turns golden brown on edges (and make sure the middle doesn't look soupy).
All done!

It is best eaten while still pretty warm, but let it cool a little before eating.  Seriously.  It's upsetting to take a bite, have a cherry burst lava hot filling into your mouth, and burn your tongue bad enough to not be able to taste the rest of it afterwards.  You have been warned.

A few notes:
  • The temperature is not critical.  You could probably bake this anywhere between 350°F and 425°F and it would be just fine.  That way you can stick it in the oven with something else and bake at the same time.  Just adjust the time as needed.
  • So far we have made this with cherry, blueberry, apple, and peach filling.  All have been good.  My favorite is cherry, though.
  • I think the original called for 1 can of pie filling, but I like a little more filling so sometimes I use 2 (especially if I'm using a lightly bigger pan where it gets spread out more).
  • No need to refrigerate leftovers.
  • You can also make this over a campfire!  Line a dutch oven with foil, layer the ingredients in the same way, cover, and let cook until done.  We have done it before, and it was awesome!  Just don't forget the foil.
That's it!  Super easy, and the recipe is flexible.  Oh, and it's even better served with vanilla ice cream!

Friday, August 15, 2014

Favorites Friday - Tony and Lisa's Awesome Pizza of Doom

We stumbled across a specialty pizza at Mellow Mushroom one time, and it had a load of toppings that sounded delicious.  I think it was called "Hey Dude"?  Well we loved it, and decided to make our own version at home, with some personal touches.  This is typically what we make now when we do pizza from scratch.  I tried to think of what to call our pizza a while back, and in a moment of silliness I wrote down "Tony and Lisa's Awesome Pizza of Doom" and that's what I've called in in my head ever since; though in real life we just call it "our pizza".


Tony and Lisa's Awesome Pizza of Doom

Ingredients
(Use your judgement for amounts, based on your personal preference)

  • Pizza dough (we like Publix or Trader Joe's)
  • Olive oil
  • Garlic, minced or garlic powder
  • Grated parmesan or romano
  • Pizza sauce  *see note
  • Mozzarella
  • Pepperoni
  • Bacon bits
  • Chicken, shredded (or canned)
  • Buffalo sauce
  • Jalapenos (optional)
  • Onions, diced (optional)

Instructions
Let the dough rest at room temperature, as instructed on package.  Prepare/preheat your pizza stone (if using one).  Mix chicken with some buffalo sauce.  Roll out the dough into a large circle, and place onto the greased pizza stone or pan.  Brush (or Misto) the edges with olive oil, and sprinkle with garlic and parmesan/romano on edges.  Layer sauce, cheese, and toppings in order listed, finishing with a drizzle of buffalo sauce swirled on top. 

All prepped and ready to go in the oven!
Bake at 400°F for about 18-24 minutes (check what your dough package says), until cheese and crust turn golden brown.

    
Fresh out of the oven!  (No jalapenos or onions on this one)
 
We recently tried a variation using some leftover garlic butter spread from Publix, melted and brushed on the crust instead of olive oil.  It was even better!  But it's not something I keep around all the time.

*We have tried many different pizza sauces, some of which have been pretty good, and some have been downright icky.  The best ones we have found so far have been Trader Joe's fresh sauce (found right next to the pizza dough) and Classico jarred pizza sauce.  Publix brand jarred sauce wasn't bad, either.  Avoid Ragu at all costs.  There was also another one that I found was just too chunky, but for the life of me, I can't remember what brand it was.  (I know...helpful, right?)

Enjoy!

Friday, July 11, 2014

Favorites Friday - Cowboy Food

I have to share the story behind this one.  This is a recipe that my mom came up with when I was a little kid, but she originally called it "Bobbi's Ziti Beef Casserole".  My brother though it was icky and wouldn't eat it until my dad told him "this is what cowboys eat!", and then, of course, he loved it!  Ever since then, it has been known as "Cowboy Food", and it has been a family favorite.  I began making it for friends that came over in college, and they all loved it, too.  It's a good way to fix something fairly quick when people come over, but if you make it for just two people it makes good leftovers, too.  My husband and I make it fairly often, and by now we have added our own little modifications to improve on the original recipe.

Look at that glisten of cheesy goodness!


Cowboy Food
Makes 8 4 servings (Who am I kidding? We scarf this stuff down!)

Ingredients
  •  ~1 lb ground beef
  • 1 T onion flakes
  • 1 can cheddar cheese soup
  • 1 3/4 C ziti
  • 1 C frozen peas (or a little more if you want to sneak in extra veggies)
  • 1 1/2 C water
  • 1/2 tsp salt
  • 1/8 tsp black pepper
  • 1/8 tsp cayenne
  • 1 tsp paprika
  • 1-2 handfulls of shredded cheddar (this is one of those modifications we made to the original)
Instructions
  1. Brown ground beef in large skillet and drain grease.
  2. Add seasonings, water, cheddar cheese soup, ziti, and peas.
  3. Bring to a boil.
  4. Cover and simmer for 15 minutes, or until ziti is cooked.
  5. Remove lid, add cheddar cheese, and stir.  (You could add in the cheese near the end of the simmer time, if you prefer to have more melting time.)
  6. Let sit a few minutes for cheese to melt and sauce to thicken.

The amounts above are for the original fairly mild version.  If you like it spicier (like me), you can add extra pepper and even a little chili powder to taste.  I usually make the whole thing with approximately the amounts called for, and just add extra spice to my bowl.  Another tip: use frozen peas, not canned. I used canned peas one time, and it just didn't taste right.

Enjoy!

Thursday, July 10, 2014

Thirsty Thursday - Wedding Punch

I decided to come up with my own punch recipe when we got married.  It took a little experimenting (I discovered that pineapple juice and soda cancel each other out, and it's just weird), but I finally came up with a recipe that had a good balance of flavors, and just the right amount of alcohol. It was a huge hit at the wedding, and it disappeared fast!

Wedding Punch

Ingredients
  • 1 qt Hawaiian Punch (Fruit Juicy Red)
  • 1 can pink lemonade concentrate
  • 2 cans water 
  • 1/2 can Peach schnapps
  • 1 can Spiced rum
  • 2L bottle of Sprite (or generic lemon-lime soda)
Instructions
Mix all ingredients except Sprite.
Add Sprite just before serving.

I typically store the mix in a sealed pitcher or a Hawaiian Punch jug until it's ready to serve.  You can also make this non-alcoholic and just leave out the schnapps and the rum, and it's still a tasty mix.


Sadly, I don't have a picture of the punch.  But here's a picture of one of our wedding toast flutes!

Wednesday, July 9, 2014

Lemon Pepper Salmon Foil Pack

I have been really bad lately about not cooking.  I have been trying to get in more time at the gym, typically going on the way home from work, and by dinnertime I'm tired and don't feel like coming up with something for dinner, so we resort to the easy, less healthy meals.  I have decided to make more of an effort to plan my meals in advance, try to coordinate ingredients for the week, and even prep part of the meal in advance.  For example, I have several meals planned for this week that include rice, so I cooked a bigger pot of it and put the rest in the fridge for later this week.  (I recently discovered how much I like brown rice, and now I prefer it over white. Did you know brown rice (non-instant) takes 45 minutes to cook? Making it in larger batches can be a big time saver.)  Same thing can be done for other starches like pasta and potatoes as well as cooked vegetables.  Hopefully I can keep this up healthy meal planning long enough for it to become a habit! 

I haven't had fish in a while, so I thought fresh salmon would be a good start to my healthy meal planning.  I paired it with some brown rice, glazed carrots, and corn on the cob.  (Both the carrots and corn on the cob were done in new ways also, and worthy of a quick blog post, but I didn't think to take pictures of those processes!  Drat!)  This is another idea I saw on Pinterest, but I've seen it before.  Publix had cuts of salmon on sale this week, which is what I originally intended to pick up, but it turns out that buying it by the pound with the skin still on was still cheaper. Supposedly, cooking it with the skin on is healthier, too, because the healthy omega fats that you hear about are contained mostly in the skin and are released during cooking - a healthy benefit that would be lost if the skin was removed first.  The skin also helps hold the fish together while cooking, and can usually be peeled off easily after it's cooked.


Lemon Pepper Salmon Foil Pack
Makes 1 foil pack

Ingredients
  • fresh salmon (only 1 piece per foil pack)
  • fresh lemon
  • pepper
  • butter
  • foil
Instructions
Preheat oven to 350°F.  Lay salmon (skin side down) on a large piece of foil.  Sprinkle with pepper.  Slice lemon and place on top.  Add a few pats of butter on top.  Wrap tightly, and place in a pan (to catch drips if it leaks.)  Bake for 25+ minutes, until cooked through.  (Salmon should turn from a clear pink to an opaque pink when it is cooked.)

What it looked like before wrapping it up

When I checked my salmon at 25 minutes, it was still uncooked on the outside.  So I turned the oven up to 400°F and it still took another 15 minutes to bake.  The salmon was a larger piece, though (1lb), so smaller pieces might be cooked enough at 25 minutes.  I would recommend just checking at 25 minutes, but allow yourself more time if it needs to cook longer.  You don't want to overcook fish if you can help it, because it tends to dry it out, but the nice thing about the foil pack and butter is that it traps in the moisture (essentially steaming it) and it doesn't dry out as easily.  Also, if you use salmon with the skin still on, the skin will stick to the foil and peel right off of the meat.  And foil makes the cleanup so much easier!

The Verdict
Very tasty!  It had a nice mild flavor and wasn't dried out.  It could have used a little more pepper (or maybe even a mix of different peppers instead of just black pepper), and maybe squeezed the lemons on top just a little before baking.  This dish was healthy, easy to make, and had easy cleanup. I would probably make this recipe again, but I will definitely use the foil pack technique again!

Wednesday, June 18, 2014

Lemon Meringue Pie

Lemon Meringue Pie is one of the hubby's favorites, and I've been promising to make him one for a while.  (I thought about it, and the last one I made was about 7 years ago!)  So, for his birthday, I finally made him his pie!

I'm not sure what recipe I used the first time, but I found this recipe over on AllRecipes.com


Lemon Meringue Pie

Ingredients
  • 1 C white sugar
  • 2 T all-purpose flour
  • 3 T cornstarch
  • 1/4 tsp salt
  • 1 1/2 C water
  • 2 lemons, juiced and zested
  • 2 T butter
  • 4 egg yolks, beaten
  • 1 (9-inch) pie crust, baked
  • 4 egg whites
  • 6 T white sugar
Instructions
  1. Preheat the oven to 350°F.
  2. To make lemon filling: In a medium saucepan, whisk together 1 C sugar, flour, cornstarch, and salt.  Stir in water, lemon juice, and lemon zest.  Cook over medium-high heat, stirring frequently, until mixture comes to a boil.  (Or at least a simmer - I think a simmer was the best I could do.)  Stir in butter.  Place yolks in a small bowl and gradually whisk in 1/2 C of hot sugar mixture. (This helps get the eggs up to temperature without turning them into scrambled eggs.)  Whisk egg yolk mixture back into remaining sugar mixture.  Bring to a boil (again, at least a simmer) and continue to cook while stirring constantly until thick.  Remove from heat, pour filling into baked pastry shell.
  3. To make meringue: In a large mixing bowl (glass or metal), whip eggs until white and foamy.  Add the 6 T of sugar gradually, and continue to whip until stiff peaks form.  Spread meringue over hot lemon filling in pie, sealing the edges at the crust.  
  4. Bake in preheated oven for 10 minutes, or until meringue begins to turn golden brown.
  5. Let cool completely at room temperature (about an hour).  Chill in refrigerator for at least a few hours (about 3) before serving.  Do not cover.
At the hubby's request, I actually left the zest out of the filling, and based on recipe reviews I added a little bit of lemon extract.  (Unfortunately, I don't remember the exact amount...maybe 1 tsp?  This is why I should be writing these reviews right away!  Otherwise, I can't remember details like that.)  I simply spread the meringue on top, and had a little bit of a hard time trying to get it to look good.  I should have just piped on the meringue, it would have been so simple and looked so much better!    Also, if the meringue were piped, you would see it start to turn golden brown on the peaks, and it wouldn't have gotten the cooked brown film-like layer on top (you can kind of see it in the picture above).  Next time I will keep that in mind.

The comments on the original recipe gave me some tips about meringue that I didn't know before.   For starters, the meringue needs to be whipped into stiff peaks to give it the proper texture, otherwise it may end up kind of gummy or rubbery.  (I already knew this.)  In case you didn't know, "stiff peaks" means when you lift the beater/whisk out of the bowl, it leaves "peaks" behind that stay in place and keep their shape.  "Soft peaks" means that it will leave "peaks", but those peaks will droop and fall.  The longer you whip the egg whites, the stiffer the peaks will get.  When the meringue is added on top of the pie, it should be done while the lemon filling is still hot.  (You might even want to make the meringue first, and then add it straight onto the hot filling as soon as the filling is poured into the pie.)  This will help cook the meringue on the bottom.  If the meringue is not cooked on the bottom, this will cause a liquidy layer to form in between the meringue and the lemon filling.  Another thing that can cause the pie to get a watery layer is covering it with plastic wrap.  I made this mistake the first time I made lemon meringue pie, and I had no idea.  This is why the recipe has you refrigerate the pie uncovered.  So there's a little baking lesson for today.


The Verdict
Very good lemon filling, but the meringue could use some work.  It may have just been my technique, or gotten a little overbaked.  The filling set up just right (giving the pie time to sit and solidify is important) and I had no watery layer, oozing, or seepage.  The meringue isn't meant to sit in the fridge for several days, but at that point I would eat just the filling out of the pie because it was so good!  It could use more filling to meringue ratio, though...maybe 1.5 or 2 times more filling than is called for.  I would give this recipe another shot next time the hubby really wants lemon meringue pie.  Or....this would be a great recipe to modify into mini pies or tarts!

Tuesday, June 17, 2014

White Chocolate Buttercream

I was in a 2-week training class for work, and when we introduced ourselves, my personal fun fact was that I like to bake, especially cupcakes.  When the others in the class heard this, they asked me to make some for the class one day.  Luckily, I had enough time to squeeze in some cupcake baking before the last day.  I decided to try another new frosting recipe, and this white chocolate buttercream sounded interesting.  There is an excellent detailed tutorial with pictures here.  I recommend checking out the original blog and reading the details and notes there before making this frosting.


Dark chocolate cupcake with white chocolate buttercream


White Chocolate Buttercream
Makes ~3-4 cups (will frost 2 dozen cupcakes, piped)

Ingredients
  • 1 C unsalted butter, softened
  • ~2 1/2 C confectioner's sugar (or more, depending on desired consistency)
  • 6 oz good quality white chocolate, chopped (NOT chocolate chips or candy melts!  I used Cadbury white chocolate bars.)
  • 1/4 C heavy whipping cream
  • 1/4 tsp vanilla extract
Instructions
  1. Put the chopped chocolate in a microwave-safe bowl.  Heat in the microwave, 30 seconds at a time at 60% power, stirring in between, until chocolate is fully melted.  Set aside to cool.
  2. Once chocolate has cooled, cream together butter, salt, and powdered sugar until fluffy.
  3. Gradually add the vanilla extract and whipping cream.
  4. Fold in melted and cooled chocolate.
  5. Turn mixer up to medium-high and mix for about 3 more minutes.
I beat the butter a little before adding the sugar, and then added the sugar slowly as I creamed them together (a good idea to avoid the powder "explosion" of adding it all at once).  The original recipe calls for sifting the sugar and the salt together, but I typically skip sifting when I bake things, partially because I'm impatient and partially because I don't have a sifter.  In my experience, it hasn't really made a difference.  Also, the recipe has you add the vanilla to the cream before adding to the bowl, but that's really not necessary if you are mixing well and scraping the sides.  Additionally, I used a whisk attachment when making this frosting, and whipped on a high-ish speed for at least 3 minutes at the end.  This gave the frosting a nice fluffy, whipped texture and it was the perfect consistency for piping onto cupcakes.

Piped on top with a large star tip

The Verdict
Wow!  I'm not a big fan of white chocolate by itself, but this was excellent paired with dark chocolate cupcakes.  This frosting was so good by itself though, and I found myself licking the spatulas, the whisk, the bowl, and finding excuses to stick my fingers in leftover frosting.  It's not overly white chocolatey, but you can tell it's there.  Everyone loved it, and I will keep this recipe to use again! 

Monday, June 16, 2014

Mini Cheesecakes (light)

I volunteered to make dessert for Sunday dinner when we were celebrating both Mother's Day and my brother's birthday.  I had a request to make Pennsylvania Dutch Lutheran Crumb Cake, aka "PDLCC" (probably a future "Favorites Friday" recipe), but I knew it was probably loaded with calories so I also wanted to have a lighter dessert option.  Most of our family loves cheesecake, and I have been eying some mini cheesecake recipes on Pinterest for quite a while now.  I found this particular recipe on Skinnytaste, which focuses on lighter "skinny" versions of recipes.


Mini Cheesecakes
Makes 12

Ingredients
  • 12 reduced fat vanilla wafers
  • 8 oz 1/3 less fat cream cheese, softened
  • 1/4 C sugar
  • 1 tsp vanilla
  • 6 oz vanilla greek yogurt
  • 2 large egg whites
  • 1 T all-purpose flour
  • Sliced strawberries or other fruit for garnishing
Instructions
  1. Preheat oven to 350°F.
  2. Line cupcake tin with liners.  Place a vanilla wafer at the bottom of each liner.
  3. Gently beat cream cheese, sugar, and vanilla until smooth in a mixer.  Gradually beat in yogurt, egg whites, and flour.  Do not over beat.  Pour into cupcake liners, filling about halfway.
  4. Bake 20-25 minutes or until center is almost set.
  5. Cool to room temperature, then chill in the refrigerator for at least 1 hour.
With a candle for the birthday boy
The Verdict
Very good!  And it actually tasted like real cheesecake, and not some icky fake cheesecake imposter.  Hard to believe these came in at just under 100 calories each!  The vanilla wafers as the crust was perfect.  Don't let them sit for more than a day in the fridge, though, or the wafers get soggy.  In the future, the cups could probably be filled a little more, since cheesecake doesn't rise very much.  This is a cheesecake recipe I will make again, when I want to indulge without the guilt of normal cheesecake calories. 

Saturday, June 14, 2014

Fluffernutter Frosting

In case you don't know, fluffernutter = marshmallow fluff + peanut butter.  I had to explain this to one of my younger brothers the other day, and I kind of felt like a failure as a big sister because he had never heard of a fluffernutter sandwich!  

I offered to make cupcakes for my sister's birthday party, and she requested "something with peanut butter and chocolate".  I had made a chocolate peanut butter cupcake before, but it was very dense and rich, so I wanted to try making something lighter.  (Not a "diet" version or anything...just lighter.)  I thought of using marshmallow fluff to lighten up the frosting, and after a little bit of searching I came across this recipe.   I paired it with Devil's Food Cake cupcakes from a box mix, but replaced the oil with melted butter and the water with milk.  You can use your favorite chocolate cake recipe.


Fluffernutter Frosting
Frosts ~16 cupcakes, piped

Ingredients
  •  1/2 C creamy peanut butter (the cheap kind with all that added sugar and stuff works best for things like this)
  • 1/2 C marshmallow fluff
  • 1/3 C butter, softened
  • 1/4 tsp salt
  • 1/2 tsp vanilla extract
  • ~1 C confectioner's sugar (might be able to cut this down a little)
  • 1-2 T milk

Instructions
  1. Combine marshmallow fluff, peanut butter, butter, salt, and vanilla in mixer on low speed.
  2. Add confectioner's sugar, beat until blended, and add enough milk to reach desired consistency.
I used the whisk attachment on my mixer to help get the frosting nice and fluffy.  I put the frosting in a piping bag and used a large star tip to decorate the cupcakes.  I didn't have quite enough to frost all the cupcakes I made when I piped on the frosting, so next time I would probably make 1.5x this recipe amount.  
  
Cupcakes on the cupcake tree that my sister gave me for Christmas
 

The Verdict
Awesome!  Light and fluffy, sweet, but not too rich.  (The flavor kind of reminded me of Reece's Pieces.)  The cupcakes were a hit at the party, and went like...well, cupcakes!  Will keep this one to use again!

Friday, June 13, 2014

Favorites Friday - Tuna Noodle Casserole

I had this recipe ready to post over a month ago, but apparently I never clicked the "publish" button.  Oops.

This is one of our favorite recipes, and comes from the hubby's side of the family.  (Originally from his grandmother, I think.)  It is great for feeding a crowd on a budget, and the crowd loves it!  It also makes good leftovers, reheated with a splash of milk so it's not too dry.  We tend to make an entire casserole for just the two of us, because we know we'll eat it all up within a few days.

This recipe is also easily adjustable for your personal taste, and I have noted some of our optional variations below.  Last time I made it I tried it with some pepper jack cheese, and I thought it added some good flavor.  Note that neither of us like mushrooms, but we don't mind cream of mushroom soup.  If you REALLY don't like mushrooms, you could substitute something like cream of celery instead.  (Or if you're one of those strange people who really loves mushrooms, you could add some.)  


Tuna Noodle Casserole
Makes: 13x9 casserole, ~8 servings

Ingredients
  • 1 lb bag extra wide egg noodles
  • 1 can cream of chicken
  • 1 can cream of mushroom
  • 2 cans tuna, well drained
  • 1 lb shredded cheddar, 1 or 2 handfuls reserved
  • 1/2 can peas (drained)
  • 1 can milk

Optional:
  • remaining 1/2 can peas
  • 1/2 can to 1 can petite diced tomatoes
  • swap half the cheddar for pepper jack cheese
  • crushed potato chips (cheesy chips are best) or bread crumbs sprinkled on top
  • canned chicken instead of tuna


Instructions
Boil the noodles, but do not overcook (they will bake more in the oven).  While noodles are boiling, mix remaining ingredients in a 13x9 casserole dish.  Add cooked noodles and mix again.  (If noodles cannot be mixed, add a little more milk.)  Bake at 425 degrees for about 20-25 minutes.  Sprinkle reserved cheddar cheese evenly over the top and bake for another 5-10 minutes, until cheese is fully melted.

This is about what it should look like before adding the noodles
(I forgot to take a picture once it came out of the oven.  I think I was distracted watching Sherlock at the time.)

Well, it's been a while...

...sorry for the lack of posts lately.  Life just got busy.  I do have pictures and recipes lined up to post, so I plan to do a little catching up and get back to regular weekly postings.

In the meantime, have a cupcake.  (Well, not a real cupcake...just a picture of one.)

Drooling yet?

Tuesday, April 29, 2014

Smoky Bacon Pork Chops

This is another recipe I tasted at Publix, and couldn't wait to make it at home.  I also discovered how yummy pork can be, and it was cheaper than I thought.  I sense more pork recipes in my future!


Smoky Bacon Pork Chops
Makes 4 servings

Ingredients
  •  4 thick pork chops (original recipe calls for bone-in, but I used boneless)
  • 3oz pepper jack cheese, shredded
  • 3 green onions, finely chopped
  • 1/4 C cooked bacon pieces 
  • 1/4 C light mayo
  • 1 tsp chipotle pepper sauce
  • 2 tsp mesquite seasoning
Instructions
  1. Preheat oven to 425F.  Line baking sheet with foil.
  2. Season pork chops with mesquite seasoning; place on baking sheet.
  3. Combine cheese, onions, bacon, mayo, and pepper sauce.
  4. Spread cheese mixture evenly over pork chops.
  5. Place on middle rack; bake 8-9 minutes.
  6. Turn oven temp to broil; broil 2-3 more minutes or until pork is browned and up to 145F.

Publix's Aprons recipe usually includes nutrition information, and this one weighs in at only 370 calories per serving.  Using the nutrition calculator on My Fitness Pal for the specific ingredients I used, the calories per serving came out to about 320. 

Om nom nom

The cooking time needs some adjustment.  I left it in a little longer than the recipe said, and it was still a little too pink in the middle when I cut into it, so I had to put it back in the oven for a few minutes.  I think it ended up getting a little overcooked in the end, though.  Maybe try 11-12 minutes, then broil for 2-3?  The pork chops definitely had a little kick to it, maybe a bit too much mesquite seasoning, though, so go easy on the seasoning.  I used real bacon bits because I keep them on hand and it was just fine.  I'm sure real bacon cooked fresh for the recipe would be even better, but it was so much easier to just use the ready to go bacon bits.  Overall, this was a pretty easy recipe to make.
The Verdict
Tony thought it "wasn't bad", and I thought it was quite yummy!  I will probably make it again sometime.  And I will definitely give more pork recipes a try!

Friday, April 18, 2014

Favorites Friday - Irish Soda Bread

This is a family favorite recipe that my mom passed down, but I believe it is originally from Betty Crocker.  It's pretty easy to throw a loaf together (and a double batch is just as easy), and doesn't take long since there is no rising time involved.  I think it is best the day after it is made, slathered with butter or margarine.  I like it best with raisins, and feel like it's missing something when I make it without them, but it's still delicious both ways.

Irish Soda Bread
Makes: 1 round loaf

Ingredients
  • 3 T margarine or butter, softened
  • 2 1/2 C all-purpose flour
  • 2 T sugar
  • 1 tsp baking soda
  • 1 tsp baking powder
  • 1/2 tsp salt
  • 1/3 C raisins (optional)
  • 3/4 C buttermilk (I use Saco buttermilk powder)
Instructions
Mix dry ingredients together.
Cut margarine into dry ingredients.
Stir in raisins and enough buttermilk to make a soft dough.
Turn onto lightly floured surface; knead until smooth (1-2 minutes).
Shape into round loaf ~6-7" diameter.
Place on greased cookie sheet.
Cut an "X" on top, ~1/4" deep with floured knife.
Bake at 375F for about 35-45 minutes until golden brown.
Brush with margarine near the end of baking time, if desired.

Lisa's cheat: don't bother with the floured surface or cutting in "X"; just knead by hand in the mixing bowl for a few minutes, then form into a round shape on the pan as best as you can.  The dough will be sticky, so it won't look perfect.

Friday, April 11, 2014

Favorites Friday - Cheesy BBQ Sloppy Joes

This has been a favorite of ours since I first tried it several years ago.  I came across this recipe in a Southern Living magazine, so I can't take credit for this awesomeness.  I was able to dig up the original recipe online here.

Cheesy BBQ Sloppy Joes
Makes: about 4 servings

Ingredients
  • 1 1/2 lbs ground beef
  • 1 (14.5oz) can petite diced tomatoes
  • 1 C ketchup
  • 1/2 C BBQ sauce (we often use Sweet Baby Ray's or whatever's open)
  • 1 T Worcestershire sauce
  • 2 T chopped jalapenos, from jar
  • 1 T juice from jar of jalapenos
  • garlic texas toast (1-2 slices per serving, depending on the size of the toast)
  • shredded cheddar cheese, for topping
Instructions
Brown ground beef in large skillet; drain grease. Stir in tomatoes, ketchup, BBQ sauce, Worchestershire sauce, jalapenos, and jalapeno juice.  Cover and simmer about 10 minutes, until sauce has thickened.  While sauce is cooking, prepare texas toast.  Serve sauce mixture over texas toast and sprinkle cheese on top.


This is a good "grown up" version of Sloppy Joes that packs a lot of flavor.  The jalapenos add some spiciness, but you can adjust to your personal preference. (I love it spicy!) Combining with the garlic toast and cheese is what really seals the deal, though.  Be warned, this recipe is so "sloppy" that it just needs to be eaten with a fork! 

(Note: I tried to double the recipe once, but it was difficult to get the sauce to thicken up right with more in the pan.)

Thursday, April 10, 2014

Grasshopper Cupcakes (Thin Mints)

I got a request to make my "Better than Thin Mints - Grasshopper Poke Cake" again for Sunday dinner, but I was in the mood to make cupcakes!  I took the basic concept of the cake, lightened it up (a little bit), and converted it into cupcake form.
 

Grasshopper Cupcakes
Makes 18-24

Ingredients
  • 1 box devil's food cake mix,
  • Eggs, oil, water according to cake box instruction
  • 1 box thin mints
  • 1 container cool whip
  • 1 packet mint chocolate frosting flavoring
  • 1/8 tsp peppermint extract
  • 1/3C heavy cream
  • 8oz chocolate chips 
  • 1/2C Andes mint pieces for topping (appx)


Instructions
Mix cake mix according to box directions.  Place a thin mint cookie at the bottom of each cupcake liner, and cover with cake batter.  Bake according to box directions. Let cool.


Combine cool whip and mint chocolate flavor packet.  Add a few drops of green food dye (optional) and mix well.  Place in refrigerator to keep cool until ready to frost.


Make ganache: in a double boiler, warm heavy cream until it begins to bubble at the edges (do not burn!).  Remove from heat, and stir in chocolate chips until thoroughly melted.  Stir in mint extract.  Allow ganache to cool slightly; it should be thin enough to spread out over the top, but thick/creamy enough to hold in place without running off the cupcake.

Dip tops of cooled cupcakes into ganache.  If tops are not high enough to dip, pour a little over top.


Cool until ganache is hardened.  Pipe frosting onto cupcakes.  Top with Andes bits.
Enjoy!


The Verdict 
Another favorite!  I think these were about as big of a hit as the poke cake!  They are minty and sweet, without being too rich; the cool whip frosting helps keep it lighter.  The worst calorie offender of the cupcake is probably the ganache, which could be optionally left off to lighten it up a little more.

Wednesday, April 9, 2014

Baked Brie Bites

This is a pretty simple recipe that I adapted from here.


Baked Brie Bites
Makes 18

Ingredients
  • 1 pkg puff pastry sheets
  • 8oz brie
  • 1C preserves/jam (appx)

Instructions
Thaw puff pastry according to directions.  Preheat oven to 350F.  Cut each puff pastry sheet into 9 squares.  (Pillsbury is folded into thirds, so that makes it pretty easy.)  Grease muffin/cupcake pans.  Place pastry squares over muffin cups, and poke in slightly.  Cut brie into evenly sized chunks (include the crust) and place one piece in the center of each pastry.  Top with about 1tsp of preserves.  Bake for about 15 minutes, until pastry is golden on edges (do not overbake).

I have made this recipe twice now, using a homemade caramel apple jam (tastes more like apple pie filling).  Both times, it was a hit!  They disappeared quickly, and everyone could barely wait until it was cool enough to eat.  Even people who said they weren't fans of brie thought it was good.  A few tips I have found after making this twice now: use the puff pastry when it is still cool, make sure to grease the muffin tins, bites are easier to remove from pan after cooling slightly but still warm.

(Note: looking back at the original recipe now, I see that it was for 24 bites; the puff pastry sheets were cut into 12 pieces each.  Either way would work just fine.)

The Verdict
Definitely a new favorite!  This one gets added to my "recipe book" and I am looking forward to trying it again and again with different flavored preserves.  Maybe cranberry next time?

Classic Stromboli

This is another recipe from Publix, but it is not available online so I only have the recipe card.

Classic Stromboli
Makes 2 Strombolis (4 servings)

Ingredients
  • 1 lb pizza dough (I used the fresh dough found in the Publix Bakery)
  • 1/4 C flour (or less, for dusting surface)
  • 1/2 C ricotta, divided
  • 12 slices pepperoni, divided (I used more)
  • 1 C cooked sausage crumbles, divided (I used Jimmy Dean Italian sausage)
  • 1 C shredded Italian cheese blend, divided
  • 1/4 C fresh basil leaves, coarsely chopped
  • Pizza sauce for dipping
Prep
  • Remove dough from refrigerator and let stand 1 hour (up to 1.5 hours).  (Do not remove from bag until after stand time is complete.)
  • Preheat oven to 400F.  Grease baking sheet.
  • Chop basil
Instructions
  1. Divide dough in half; turn each half of dough out onto a lightly floured surface and roll into approximately 6x12-inch rectangles.
  2. Spread 1/4 C ricotta cheese over each half of dough, leaving a border; top with pepperoni, sausage, shredded cheese, and basil.  Starting on the long side, roll dough tightly around filling; pinch edges to seal and place seam side down on baking sheet.
  3. Bake 18-20 minutes or until browned and thoroughly heated.  Let stand 5 minutes.  Slice Stromboli; serve with pizza sauce for dipping.
Another option:
Roll pizza dough into approximately 12-inch circles.  Spread cheese and toppings on one half of each, and fold empty half over top, sealing edges.

I tried making it each way.  One was just a circle folded in half, the other was rolled (but I realize now that I messed up and rolled it in the wrong direction).  I left the basil out, because I forgot to get fresh basil while I was at the store.

A note on the pizza sauce: we have tried several different sauces on our homemade pizzas, and we have found some good, and some bad.  Trader Joe's makes a pretty good pizza sauce, found in the refrigerated section.  Prego is also pretty good.  This time around, we tried "La Famiglia DelGrosso" pizza sauce, and thought it was good as well.  Classico was too chunky for my liking.  The one I would really avoid is Ragu...it just tastes too fake, has no real texture, and doesn't have good flavor.


Not bad.  It didn't wow me, though.  Personally, I think I could use more cheese. (Who can argue with more cheese?!) In my opinion, the cheese should ooze out of a Stromboli when you cut into it, and this just didn't ooze.  I would at least double the ricotta in the recipe.  Tony suggested using a spicier sausage.  I used Italian flavor, but I agree: spicy sausage might work better.  I think it could have used some more flavor in general, and leaving out the basil was a mistake.  I would probably add some Italian seasonings (oregano, garlic, pepper?)  into the ricotta cheese, and spread that blend onto the Stromboli. 

The Verdict
In the end, it wasn't bad, but I would add more cheese and seasonings if I made it again.  It would be worth another try.

Thursday, March 20, 2014

Thirsty Thursday - Dirty Monkey

I might start doing an occasional feature where I share drink recipes.  Now I'm not going to go mixing up new alcoholic beverages mid-week on a regular basis, as that may have unwanted side effects (working hungover is not fun).  I will, however, share some good ones that I have in my repertoire already, some of which are my own creation.  I might even expand the selection to homemade smoothies and juices.  We'll see where this goes.

A co-worker of mine recently came back from a cruise and told us her drink of choice while down there was something called a "Dirty Monkey".  From her description (frozen, brown, and yellow) I deduced that it must be some sort of chocolate-banana based drink (makes sense, right?). Yes, I just used the word "deduced".  I just finished watching season 3 of Sherlock, and now I can't wait for the next season!  But I digress...I looked for a "dirty monkey" recipe online, but every recipe I found was a little different, so I decided to take the idea and make my own.

Dirty Monkey
Makes 2 servings
  • 1 banana
  • 2 shots of rum (I used spiced rum)
  • 1 shot of kahlua (coffee liqueur)
  • 1 shot of Coco Real (a squeezable bottle of coconut cream that I was recently introduced to)
  • 2 cups of ice (approximately, use your judgement here)
  • Hershey's syrup
Mix all ingredients except chocolate syrup in a blender; blend well, until smooth.  Squirt chocolate syrup around the inside of the glasses you are going to serve in.  Pour blended mixture into glasses.  Serve with a straw, and garnish as desired.

It looks...dirty

Not bad!  The chocolate and banana flavors were prominent, with a hint of coconut, and coffee to cut the sweetness a little.  The alcohol was not very noticeable, but I did feel it by the time I finished the drink. The recipe could easily be adjusted a bit to use some different types of rum, maybe even some chocolate liqueur, and there are many options for garnishing if you're not lazy like me.

The Verdict
This one is a keeper!  (Although there are other frozen drinks I would prefer over this one.)  Maybe next time I will try it with some coconut rum.  Mmmm!

Wednesday, March 19, 2014

Cream Cheese Pancakes

I know it's a little late, but I would like to share what we made for dinner on Mardis Gras!  I wanted something besides the usual plain pancakes, so I dug up this recipe from Southern Living.


Cream Cheese Pancakes
Makes: about 12 (4-inch) pancakes

Ingredients
  • 2 C self-rising flour (or 2 C all-purpose flour, with 1 T baking powder and 1/2 tsp salt)
  • 2 T sugar
  • 1 egg
  • 1 1/2 to 2 C milk
  • 3oz cream cheese, softened
  • 1 T butter or margarine, melted
  • 1/2 tsp vanilla extract

Instructions
  1. Combine dry ingredients in a large bowl; make a well in center of mixture.
  2. Combine egg, cream cheese, butter or margarine, vanilla extract, and 1 1/2 C of milk in a small bowl, stirring well.
  3. Stir wet mixture into dry ingredients, stirring until just moistened (you don't want to over mix your batter).  Add more milk if needed.
  4. Pour 1/4 C batter for each  pancake onto a hot, lightly greased griddle.  Cook pancake until tops are bubbly; flip and cook the other side.
  5. Serve with your favorite toppings and sides.
These pancakes were tasty!  They somehow seemed a little denser/thicker/creamier than my usual pancakes, but the difference was subtle.  I really didn't taste the cream cheese, until I hit a little lump of it, and then I would get a little burst of flavor.  But when I made the pancakes, the cream cheese wasn't as soft as it should have been, so it was lumpy in the batter instead of being creamy.

The Verdict
Good, but the difference between these and the usual plain pancakes was negligible.  I might give this recipe another shot, making sure I get the cream cheese softened enough to blend well.  Otherwise, it's not worth the extra effort to make these from scratch; I would rather use my homemade pancake mix that's ready to go.

Friday, March 7, 2014

Creamy Citrus Salad

I made this along with the Pepper Shrimp Saute. Again, sorry for the lack of pictures in this post.

The original recipe was from Publix, and came with the Pepper Shrimp Saute recipe.  However, I really only used it is a general guideline and I ended up making a bunch of modifications using ingredients I had on hand...so I'm just going to post my version here.
....On to the good part! 

Creamy Citrus Salad

Ingredients
1 can mandarin oranges
2 grapefruits
1 tablespoon honey
1 individual size cup of vanilla Greek yogurt
2ish handfuls mini marshmallows


Instructions
Drain most of the liquid from oranges and put in a medium bowl.  Scoop out grapefruit and add to oranges.  Add honey, and stir.  Let chill in the fridge until ready to serve.  Just before serving, stir in Greek yogurt and marshmallows.


The Verdict
I messed it up when I made it.  I left in a good bit of the juice from the oranges, and added a little juice from the grapefruits.  It was WAY too liquidy!   I ended up eating it out of a cup with a spoon.  My marshmallows were also a little...not fresh...so I let the marshmallows soak a bit to soften up.  But even with those problems, it was still delicious!  It was so cool, and fresh, and sweet (but not too sweet), with a bit of sour flavor from the grapefruit, and little bursts of sweetness when you bite into a marshmallow.  Publix did the right thing by pairing it with the Pepper Shrimp Saute...the cool flavor from the citrus salad was perfect for eating after a spicy meal.
It would have been much better if it was actually creamy (instead of liquidy), but this was so good, I would definitely make it again!

Pepper Shrimp Saute

I know it's been a little while since my last post.  Things have been pretty busy around the house, but at least I'm getting stuff done!  I probably need to make a short list of what I want to try cooking next, because I've just been too lazy or too busy to pick something out of the hundreds of recipes I want to try.  This recipe was an easy decision, though.  I was at Publix doing some grocery shopping, and they had this recipe featured for taste-testing.  I'm normally not a big fan of shrimp, but I gave it a try and loved it!  About a week later, I tried making it at home.  The full recipe can be found on the Publix website (printer friendly version in link).

(Sorry for the absence of pictures in this post.  I could have sworn I took a picture, but I can't find it.  Maybe I forgot to take one before scarfing it down?)

Pepper Shrimp Saute

Ingredients
  • 1 medium yellow onion, coarsely chopped
  • 1 large orange (or yellow) bell pepper, coarsely chopped
  • 1 small jalapeño pepper, finely chopped
  • 1/2 cup roasted red peppers, coarsely chopped
  • 3 tablespoons fresh cilantro, coarsely chopped
  • 2 pouches boil-in-bag white rice
  • 2 tablespoons canola oil
  • 1/3 cup chipotle cooking sauce
  • 1 cup low-sodium chicken broth
  • 12 oz large peeled/deveined shrimp, tails removed
  • 1/3 cup sliced, stuffed green olives
Instructions
  1. Chop onion, peppers, and cilantro.
  2. Prepare rice following stovetop instructions on package.
  3. Preheat large sauté pan on medium-high 2-3 minutes. Place oil in pan, then add onions, bell peppers, and jalapeños; cook and stir 5-6 minutes or until tender and beginning to brown.
  4. Reduce heat on pan to medium-low. Add roasted peppers and cooking sauce to onion mixture; cook and stir 2 minutes.
  5. Stir in broth and shrimp; simmer 3-4 minutes or until shrimp turn pink and opaque and liquid has reduced by about one-third.
  6. Remove pan from heat; stir in olives and cilantro. Season with salt and pepper, if desired. Serve.


I made a few minor modifications when I made this recipe:
  • Used some chopped bell peppers that I already had in my freezer (having some ready in the freezer comes in handy a lot!)
  • Made rice from scratch instead of using the "boil-in-bag" rice
  • Used concentrated chicken broth (comes in little tubs), reconstituted with water (I find it takes up a lot less room in my pantry)
  • Used jarred jalapeño slices instead of fresh (it's a staple in our house)
  • I also left out the olives...because ick
Cooking with raw shrimp was definitely new for me.  I probably cooked them a little longer than was necessary, but I really didn't want them to be undercooked!  I was a big fan of the chipotle cooking sauce.  It was a little on the pricey side for flavoring, but it really packs a ton of flavor!  It gave the dish the perfect amount of kick.  Also, it wasn't bad leftover (if a little water is added when reheating), but the shrimp does get dry/overcooked when reheating, so it is best to avoid making so much that there is food left over.

The Verdict
Loved it!  Even the hubby liked it.  I am definitely saving this recipe to make again!

See my next post for a Creamy Citrus Salad that goes really well with this recipe...

Saturday, February 15, 2014

Bourbon Cheesecake

When the hubby offered to make a cheesecake for me for Valentine's Day, I was definitely excited!  Cheesecake is one of my favorite things.  Ever.  Seriously.  My first thought was to make a dutch apple streusel cheesecake recipe I had been eying for a while, but I stumbled across this recipe for bourbon cheesecake and it sounded really good.  It has a shortbread crust, bourbon in the cheesecake, and it's topped with a bourbon chocolate ganache...AND the recipe is for two small cheesecakes!  I actually bought a set of mini springform pans a while back ($4 for a set of 4 at Ross!), so this was the perfect excuse to try them out.  (Of course, I knew that the hubby offering to make cheesecake for me would require my help, and probably turn into me making it with his help.  I wasn't wrong.)


Original recipe is from Sugar Dish Me.

Bourbon Cheesecake with Boozy Chocolate for Two
Makes: 2 mini cheesecakes (using Wilton's 4-in diameter mini springform pans)

Ingredients
  • For the Crust:
  • ¼ cup unsalted butter, softened
  • 2 tablespoons granulated sugar
  • ½ cup all purpose flour
  • For the Cheesecake:
  • 8 ounces cream cheese, softened
  • ¼ cup granulated sugar
  • 1 egg, at room temperature
  • 2 teaspoons vanilla
  • 1 tablespoon heavy cream (or half & half)
  • 1 tablespoon straight bourbon whiskey
  • For the Boozy Chocolate:
  • 4 ounces hot fudge (the ice cream topping)
  • 2 teaspoons bourbon (more to taste)
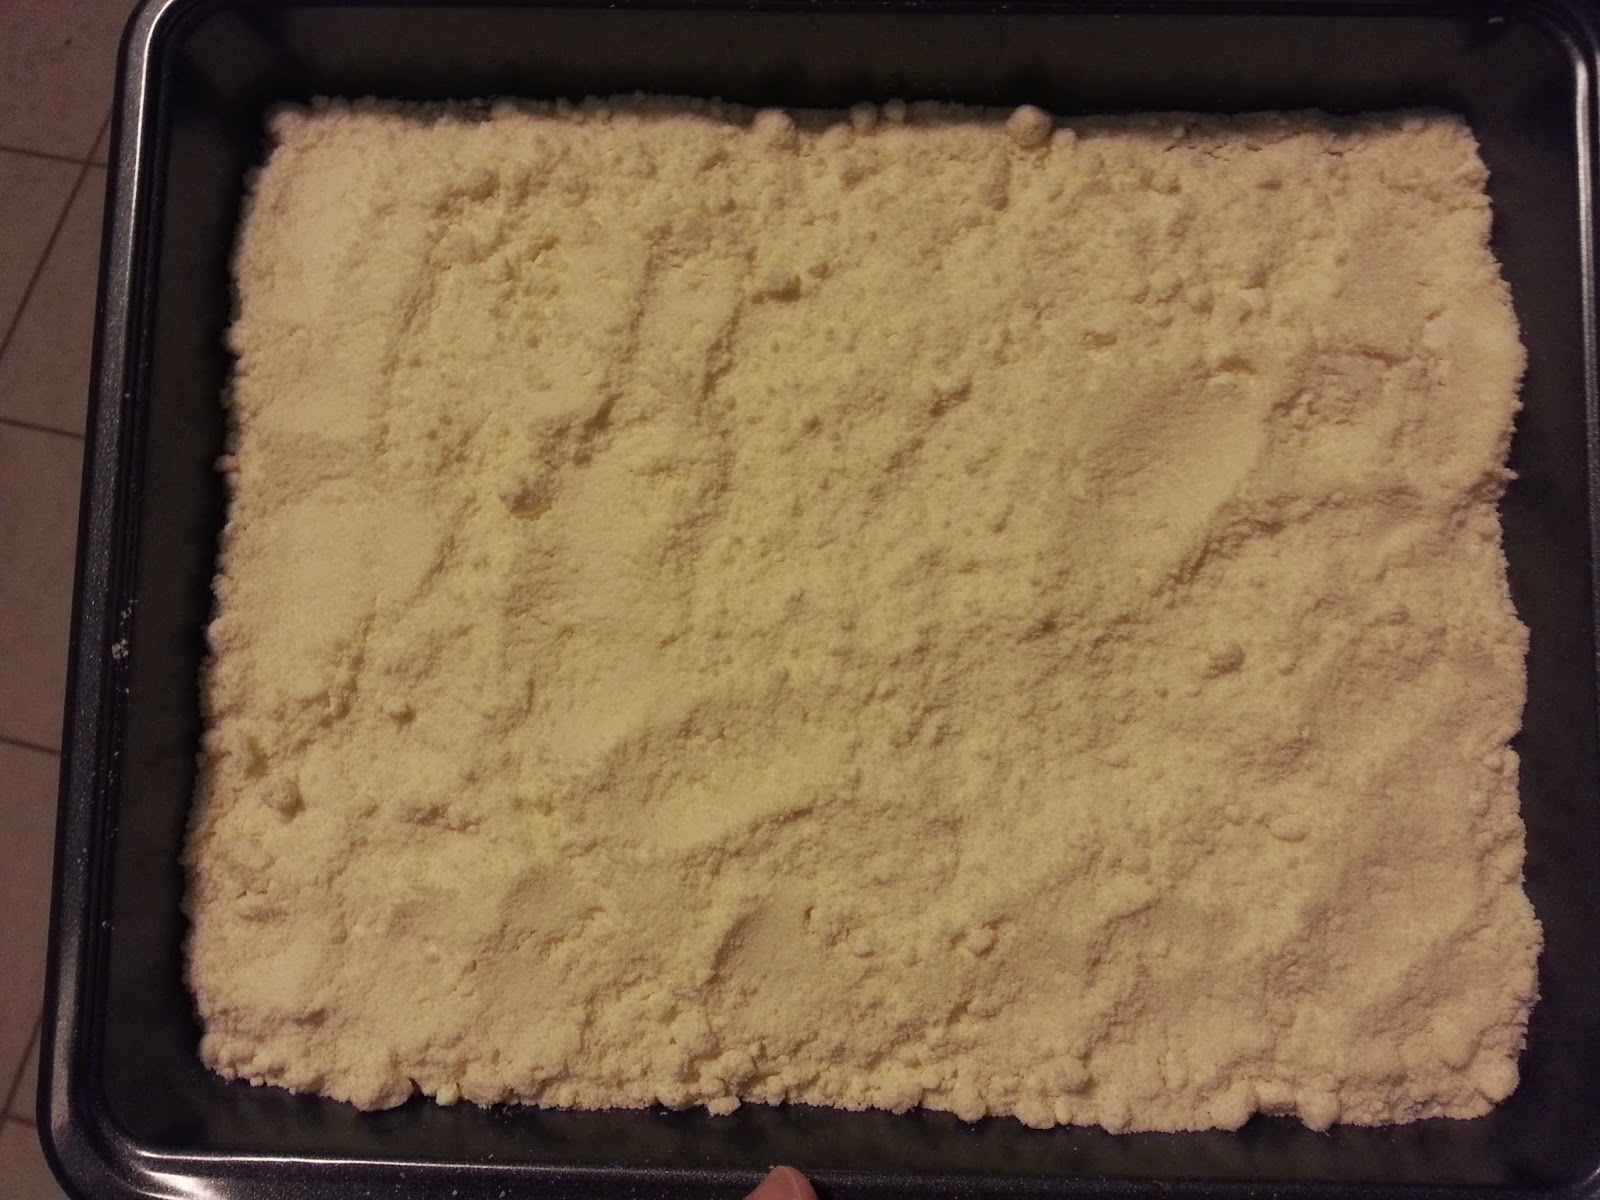
Instructions
1.  To make the crust, preheat the oven to 400. In a medium bowl combine the ¼ cup butter, 2 tablespoons of sugar, and ½ cup flour until a smooth ball of dough forms. You may have to use your fingers to press it all together.
2.  Divide the dough in half and press it across the bottom and halfway up the sides of the 2 mini cheesecake pans. Gently prick the dough across the bottom of the pan with a fork several times. Bake for only 5 minutes. Remove from the oven and set aside.
3.  Reduce the oven temperature to 350.
4.  In a large bowl beat the cream cheese and sugar until fluffy and smooth.
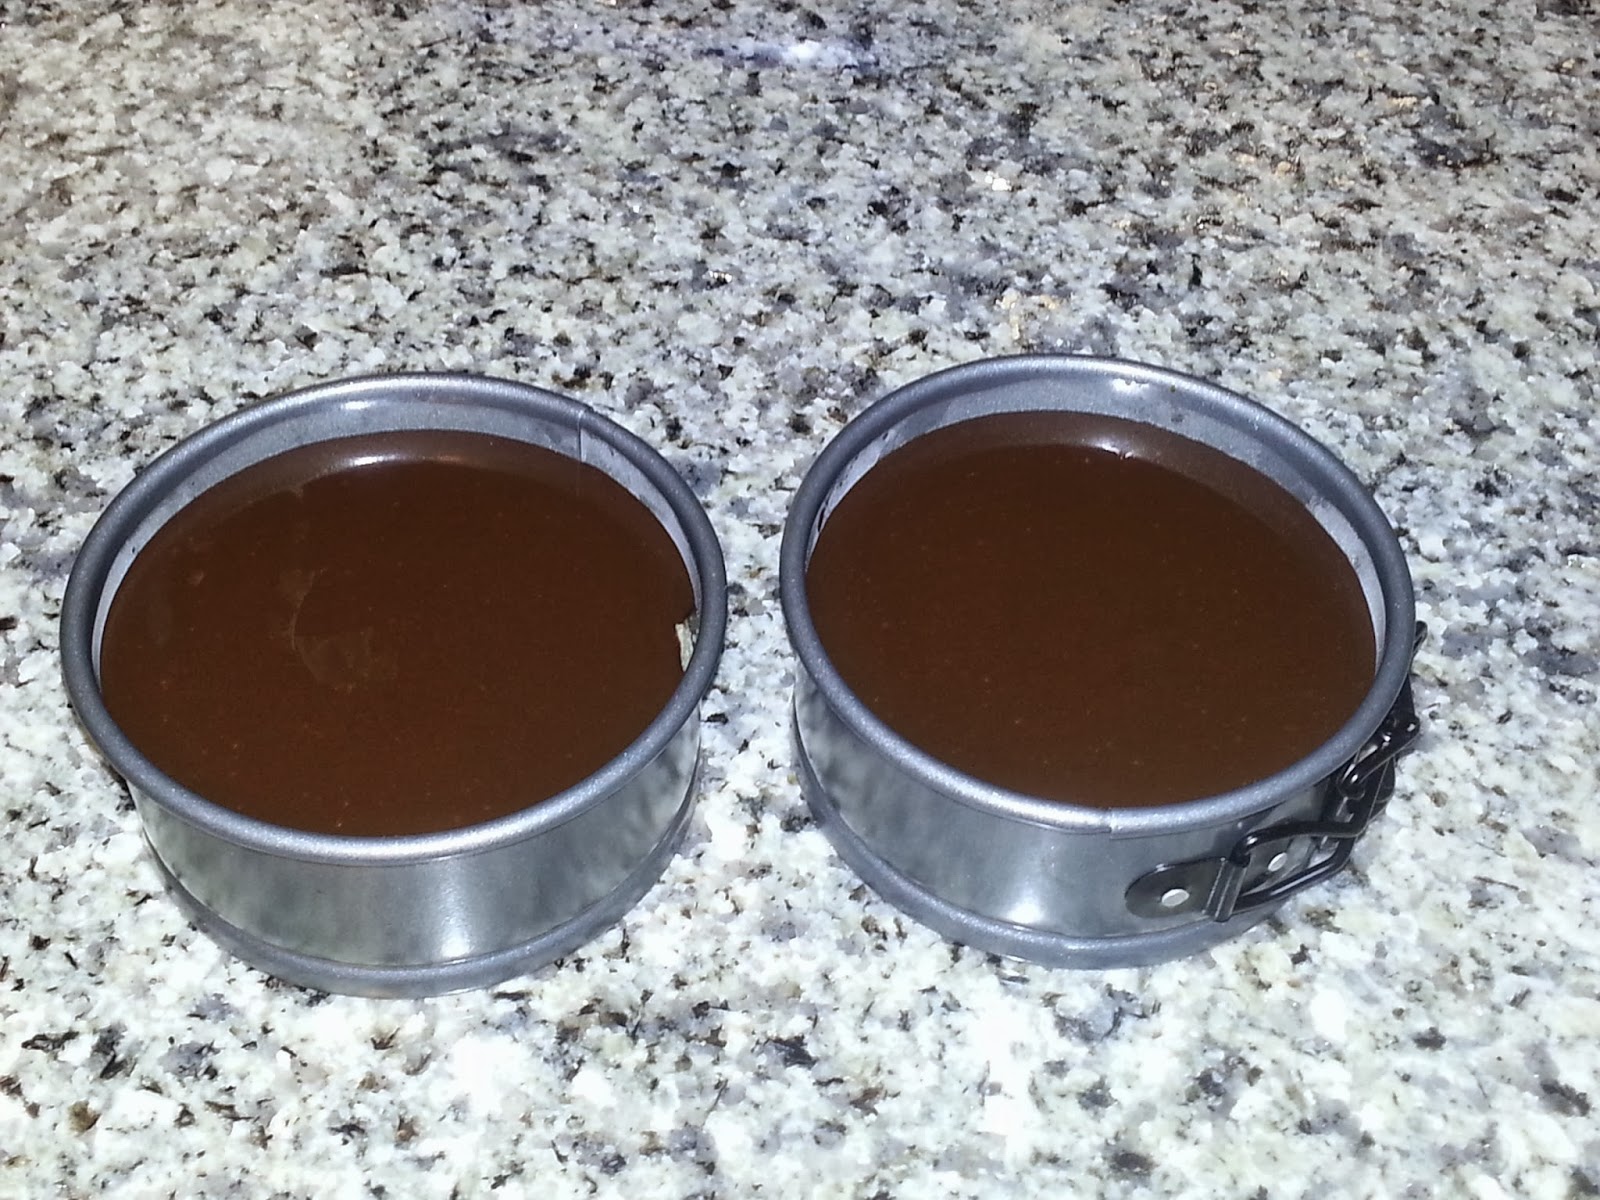
5.  Add the egg and beat for about 1½ minutes. Add the vanilla, cream, and bourbon. Beat until combined. Divide the batter evenly between the two par-baked crusts.
6.  Bake at 350 for 15 minutes. Reduce the heat to 275 (I like to open the oven door for just a minute to help the temperature drop) and bake for 15 more minutes. Turn the oven off and let the cheesecakes cool IN the oven.
7.  When they have cooled to room temperature, remove and refrigerate. (If you are in a hurry, you can take them out when it is cool enough to grab by hand — the pans will still feel warm) The cheesecakes will need to chill for at least an hour (from room temperature)


Baked and cooled
8.  While the cheesecakes chill, and just before you are ready to serve,heat the hot fudge in a small saucepan over medium high heat. When it is smooth and warm (a pourable consistency), stir in the bourbon. Drizzle the chocolate over each cheesecake and serve.

With chocolate topping


The Verdict
For a cheesecake, this was really pretty simple to make.  The only thing I would change about the recipe is to cut back on the chocolate topping; it makes probably at least twice as much as needed.  (GASP!  Recommending LESS chocolate!  I know, right?)  Some cheesecakes turn out too "cakey", and some too runny...the consistency of this cheesecake was just about perfect!  Nice and creamy, but firm. The shortbread crust is a nice touch, and I thought it went well with the bourbon flavor, but it does make it a bit richer than your typical graham-cracker crust.  The bourbon wasn't overpowering in the cake itself; it added a little bit of tang, but wasn't too strong.  Where you really taste the bourbon is in the chocolate "ganache" topping (but again, not overpowering).  I think you could easily substitute another flavor (for example, irish cream) for the bourbon if you wanted to change it up a little.  This recipe is definitely getting saved for future use!  I will probably try experimenting with some other flavors, but keep the base recipe the same. 

P.S.  If you're wondering if you can get tispy from bourbon cheesecake, the answer is no.  You can get tipsy, however, from a meal that consists of vodka sauce, bourbon cheesecake, Angry Orchard, and wine.  :-)